Showing posts sorted by date for query multi colored yarns. Sort by relevance Show all posts

Wednesday, February 20, 2019

A Girl's Best Friend.... a Cozy Shawl and Something Chocolate

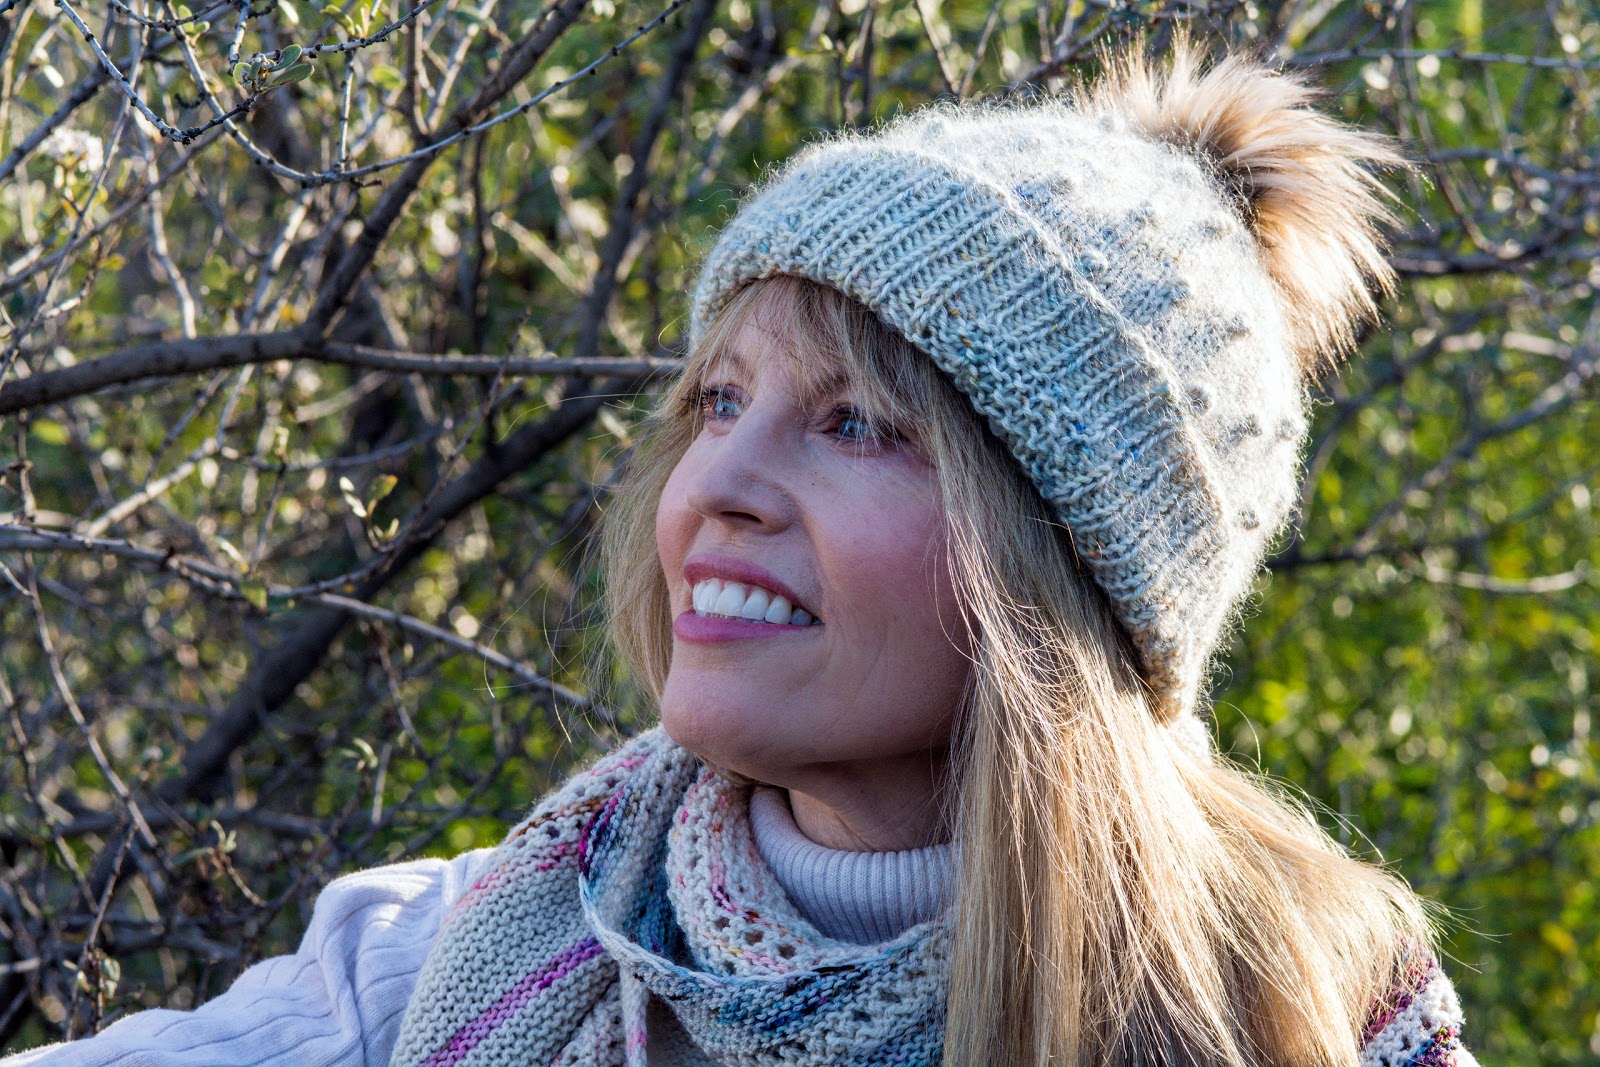
I am wearing A Girl's Best Friend Shawl which I finished in time to enjoy this Winter. Hurrah!  And boy have we had a winter this year in Southern California.  Complete with rain, mudslides, and freezing temperatures.  I'm starting to wonder why I ever wanted a change from our perpetually sunny skies in the first place.  Isn't there a song about it's never raining in Southern California?  Ah yes, It never Rains In California by Albert Hammond.  That's clearly wrong.  These days I'm humming along to Keith Urban's Long Hot Summer (filmed incidentally on a local Malibu beach) as I wistfully recall endless summer days at the beach, and my lost youth.


I've been thinking about music as we watched Bohemian's Rhapsody last night.  I highly recommend the movie.  It's a poignant story of the life of Freddy Mercury who was the lead singer of Queen (rock and roll band in the 70's).  It's worth watching particularly if you remember the band.  I grew up in the 1970s and I think that era had the best music.  There are a few artists that I enjoy today but give me the seventies rock and roll any day.  That's probably what every generation thinks - that their music was the best.  In any event Bohemian Rhapsody has been nominated for a number of Oscar awards, including best film and best actor.  Tune in February 24th to see who wins!


But back to my shawl which I really love.  It's called "A Girl's Best Friend" presumably because it's  easy to hang out with, makes you feel better about yourself, and isn't demanding to knit.  I used three different types of yarn which came together beautifully.  I took me a long time to find the right combination but once I did I knew it was right. And the best part is that one of the skeins came from a dear online friend Andi, My Sister's Knitter.  She had a give-away on her blog and I won the beautiful dark magenta yarn that finished off this shawl beautifully.  It can be tricky finding a good mix of colors for a shawl.  But using totals and neutrals is always a safe bet which is what I used here.  And, of course, having a good friend's input is sometimes just what you need. Thank you Andi!


I also have to quickly mention the fun pom poms on this shawl.  They are such a cute addition! They are also super easy to make.  All you need is a fork and you can make mini pom poms to your heart's content.  Here's a link to a Youtube tutorial.  I don't see why you couldn't add pom poms to any shawl for a little extra pizzazz.  Or make a fun garland of these to hang on your Christmas tree next year!  Note to self: that's a good idea.


Particulars A Girl's Best Friend, designed by Isabell Kraemer (Lilau on Ravelry), US 4 needles; 3 different yarns (Plucky knitter - Primo Fingering (colorway wintery mix); Anzula Yarn - Squishy - (colorway rosebud) and Peepaloo Fields - Sock (colorway nevermore)).  I made no modifications to this shawl pattern, although I did knit one less repeat of the neutral section due to yardage concerns.  If you are interested in knitting multi-colored shawls you might want to read Multi Colored Shawls and Testing Yarn for Color Fastness.   While none of these yarns bled you should always consider that risk before you embark on knitting a multi-colored shawl.

And just so you know that I'm not completely stuck in a time warp and do enjoy some contemporary music here's a link list of some of my favorite Youtube Videos ( (warning: very eclectic list):

Labryinth ~ Beneath your Beautiful
Lana Del Rey ~ Summertime Sadness
Katie Perry ~ Teanage Dream (filmed in Santa Barbara where I grew up)
Back Eye Peas ~ Meet me Halfway
Gotye ~ Somebody That I Used to Know
Nelly ~ Dilemna
Sara Evans ~ I Could Not Ask for More
Gwen Stefani ~ Cool
Rhianna ~ Take A Bow
John Legend ~ Save Room

I could go on and on.  I was young still when MTV launched and still love music videos, especially videos shot on locations I'm familiar with.

Chocolate Almond Biscotti ~


Speaking of a girl's best friend I would be remiss if I didn't mention something about chocolate. Chocolate makes me weak in the knees and eating it makes me happy.  But I don't allow myself to buy a box of chocolates very often because I simply can not control myself.  Especially if it's Sees Candy which are my favorites. On the other hand baking with chocolate renders a fine result and I'm not as greedy and as compulsive about gobbling down every morsel in the vicinity.  Probably because it doesn't have as high a sugar content and doesn't spike a craving fit.  So, for me, it's safer and more prudent to skip the candy and bake something instead.   Like Chocolate Almond Biscotti.  This recipe is a winner from Pastry Affair and I hope you enjoy it as much as I do.

If you like biscotti I also recommend trying Pistachio and Currant Biscotti (recipe link in the Finishing Touches post).  I've made these many times over the years and it never disappoints.  There's a batch cooling in my kitchen as I write this as a matter of fact.


Until next time be well, love well and remember that when you go through difficult times it's more important than ever to spend time with good friends and enjoy simple pleasures.  Sometimes all I need is a good cup of coffee and biscotti to feel better.

Sunday, February 18, 2018

Hat Topper Fun and Lucille's Red Cake Recipe ~


I've knit a lot of hats over the years but my new Kobuk hat has to be a favorite.  It might be the gorgeous yarn which has both silk and mohair making it warm and luxurious, or maybe it's the perfect wintery color, or perhaps it's the fun hat topper, or maybe it's a combination of all three!  It also has a really cool brim design that appears to resemble a crown that shows when the brim is turned down and worn slouchy style.  Which unfortunately you don't see too well in my pictures for the simple reason that the hat was easier to photograph with the brim turned up!  That being said the slouchy look with the brim showing is a cool look and I'll probably knock around wearing it that way too. No matter how you style it this is a great hat to have in your wardrobe.


I hope you noticed the cute hat topper!  This is my first time buying a hat topper instead of simply making a pom pom using leftover yarn.  Hat toppers are super on trend right now and I was curious whether I would like it better - and I do!!!  I think the hat topper gives the hat a more modern and finished look and I'm going to pick up another couple of colors and styles to have a selection to switch up depending on the accent color I want.  How will I do that?  I read on a Rav forum that some hat toppers come with a snap closure which makes it easy to change them.  But not all hat topper come with a snap closure and mine didn't.  Instead I read where someone suggested sewing a button to the inside of the hat to which a hat topper can be tied on and off.  And that's what I've done.  To do this I recommend you select a medium sized button that is plastic and light weight so it is large enough to wrap the topper ties around while being washable and not so heavy that it will drag the hat down.  This makes it easy peasy to have a wardrobe of hat toppers to switch around!


Particulars: Kobuk hat designed by Caitlin Hunter (Boyland Knitworks); knit using the Top Hat Set dyed by Lay Family Yarn (kingfisher colorway) yarn set includes 2 coordinating yarns (1 skein DK 55% Blue Face Leicester 45% silk (100g) and 1 skein 72% fine kid mohair and 28% silk).  I used a Faux Fur pom pom in colorway creme brulee sold by The Burlap Kitchen.  This a super easy and fun hat to knit.  I used the Twisted German Cast-On for a stretching brim and I only knit through the upper (bobble) chart one and a half times to create a less slouch as I have a small noggin.  Caitlin Hunter is a terrific designer and I have recently finished one of her sweaters that I can't wait to show you!

Incidentally the shawl/scarf that I'm wearing in these pictures is Enfilade by Lisa Hannes that I blogged as Multi Colored Shawls and Testing Yarn for Color Fastness.


Lucille's Red Cake Recipe ~
Steve's birthday comes early February and every year I bake him a birthday cake of his choice.  He's chosen a variety over the years but he most often he requests his mother's Red Cake Recipe that she would bake for him when he was a boy.  Lucille, his mother, graciously shared her recipe with me so that I could bake him the exact cake she made.  It's not a typical red velvet cake as Steve doesn't like chocolate so there's less cocoa and it also doesn't seem as heavy and rich as some red cakes I've eaten.  But it is light, colorful and perfect with a scoop of vanilla ice cream.  In other words it's a quintessential old fashioned birthday cake.  I'll conclude with what she wrote on the bottom of her recipe card "Good Luck!"


Lucille’s Red Cake Recipe

Yield ~ 9" double layer cake

My only adaptation of Lucille's recipe, if you will, is to add violet icing color.  Sans icing color the frosting is antique white.  

Ingredients

For the Cake

1/2 cup (1 stick) of unsalted butter, softened
1 & 1/2 cups granulated sugar, (I use superfine baking sugar)
2 large eggs, room temperature
2 tsp cocoa powder (use natural cocoa and not dutch process)
1 ounce red food coloring 
2 & 1/2 cups of cake flour (sifted before measuring)
1 tsp salt
1 tsp of baking soda
1 tsp white vinegar
1 cup buttermilk, room temperature
1 tsp pure vanilla extract

For the Frosting

3 Tbs all purpose flour
1 cup whole milk
1 cup (2 sticks) unsalted butter, softened to room temperature
           7/8 cup of granulated sugar
1 Tbs pure vanilla extract
Icing color (optional - cake is an antique white otherwise) I use Violet Icing Color by Wilton

Instructions

Cake:

Preheat oven to 350 degrees F. Prepare two 9-inch cake pans –either line bottom with parchment paper and butter sides or butter and flour entire pan. 

In a large bowl, cream together butter and sugar until light and fluffy - do not rush this process - beat at least 4 minutes.  Add eggs, one at a time, beating well after each addition.  In a small dish make a paste using the cocoa powder and a small amount of food coloring.  Add to butter mixture and beat well.  Add the balance of food coloring beating well.  Then add flour (mixed with salt) and milk alternately (roughly 4 additions) beginning and ending with flour.  Beat in vanilla.  Lastly combine vinegar and soda in a small dish (it will foam up) and gently stir vinegar mixture into batter, mixing well.

Pour into cake pans and bake at 350 degrees about 30 minutes, or until a tester comes out clean. Let cool in pans 5 minutes, then turn out onto a cooling rack to completely cool before frosting. 

N.B. As soon as cake is out of oven I like to begin preparing the frosting (which takes a little while because you have to heat the milk and flour and allow time for it to cool, etc.) and you want to frost your cake as soon as it has cooled so it will be as fresh as possible.

Frosting:

In a small saucepan whisk together flour and milk until blended and cook over medium heat, stirring constantly until mixture thickens. Set aside to cool.  You can set pan in a basin of cool water to speed along the cooling process.

In a larger mixing bowl cream together the butter and sugar until light and fluffy.  Then add 1 Tbs of cooled milk and flour mixture to sugar mixture, beating well.  Gradually add the rest beating all the time.  Beat in Vanilla.   If you choose to use icing color add it at this time, beating well. The texture of the frosting is similar to whipped cream.   As soon as cake has cooled begin frosting.

Serve with vanilla ice cream.

Good luck!

Until next time be well, love well, and have fun with hat toppers!!!

Saturday, April 22, 2017

Botan Shawlette and Spring Sugar Cookies!

This was such a fun and fast shawl to knit!  It's Botan designed by Helen Stewart and it's my new Spring-y Shawlette for the season.  I'm always super pleased when I find a quintessential seasonal piece and this couldn't be more perfect for Spring.


While this is an asymmetrical design I've blocked it to more a traditional scarf shaping (long and slender) because I find asymmetrical designs can be slightly awkward to style and wear.  Maybe if I had more panashe that wouldn't be the case.  In any event I wanted it long so I could throw it over my shoulder or let the ends curl down in front.  In other words I prefer a more traditional shaped scarf. But because I really liked the bits and bobbles of this design I simply modified it slightly and wallah I had a more traditional scarf shape but with all the cool design funk.  And I still have the option to wear it bib style, should I wish.  For your visualization if I had knit this as designed the length would have been 40" (instead of 58") and the wedge would have been 16" deep (instead of 11"). Ponder those dimensions and you'll see why they gave me pause and perhaps they will give you pause too.  If you are interested my modification is explained below.  But do so at your own risk. Wearing long scarfs does have its hazards and you don't want to end up like Isadora Duncan!


I love how well these colors worked together even though they are different bases and from different dyers. The main color is a much loved light soft tonal colorway with soft speckles throughout handdyed in Germany by Baerenwolle; and for my contrasting color I used an unloved Ysolda 2016 club yarn dyed in the Isle of Sky by Shilasdair.  It's a funny thing about Ysolda's club.  The first year (2015) I absolutely loved each and every yarn and pattern.  But still.  The club yarns and patterns from 2016 just didn't resonated with me.  I think the difference might be that in 2015 her club yarns were unique and exclusive to the club members and the designs were not released to the public for a whole year which made the club projects something special.  But that changed in 2016.   In 2016 neither the yarn nor the pattern were exclusive to club members and both were available for purchase after 6 months.  Being part of the club no longer felt so "special" and out the window flew my incentive to be a club member.  After all it makes more sense to wait and see if you like the yarn and pattern before you purchase.  So while I did join again in 2016 it fell flat with me. Maybe because I viewed each project with a critical eye "i.e. would I have purchased this project if not a club member?" Obviously with that mind set I did not renew in 2017.  But I must be alone in this view because her 2017 club sold out faster than ever.  Go figure! In any event it wasn't a total loss because slowly I am incorporating my 2016 yarns into various projects and indeed I have another of the 2016 yarns on my the needles now.  Caveat Emptor.  It's always good to remember that while clubs are fun they do sometimes disappoint.

In the end it doesn't matter how or why these yarns were paired together.  All that matters is that they were a perfect pairing!  Note to self: a true "maker" sees the creative possibilities in every skein of yarn.  Tisk tisk on me.


Particulars:  Botan (Ravelry Pattern Link) designed by Helen Stewart (blogs as Curious Handmade); 1 skein Baerenwolle BAREfoot Sock (437 yrd) Club Colorway: Morning Mist; 1 skein Shilasdair 3ply sock yarn Ysolda 2016 Club Colorway Briar Rose.  To see a summary of Ysolda's 2015 club yarns and patterns see Lunna Voe post which includes a collage of all 2015 club projects.

Vis-a-vis this pattern I modified it to eliminate the I-cord both on the working edge and the BO edge. The working edge creates a mock I-cord but after knitting several rows I realized there wasn't enough flexibility and give to that edging to stretch and block well.  So I ripped back and started over using a simple slip stitch edging, i.e. I slipped the first stitch and knit 2 stitches and placed a Stitch Marker.  On the wrong side row I simply knit all 3 edging stitches.  For the BO I used a classic lift-off method, ie. knit 2 stitches and lift the first stitch over the 1st and continue to lift each subsequent stitch off the needle.  My blocked dimensions are 58" long (vs 40" long as designed) x 11" (vs 15 3/4 " deep).  I did not block for depth and could easily have blocked it much wider and may do so next time I wash it just for comparison.

Vis-a-vis Shilasdair yarn it is dyed using natural dyeing with Cochineal and Logwood and I had to run it through several cold water rinses to remove excess dye.  This is a practice I always follow when I knit projects mixing dark colors yarns with light.  For more tips on knitting projects incorporating multicolored skeins see my post Multi Colored Shawls and Testing Yarn for Color Fastness.

Spring-y Sugar Cookies 


Easter and Passover crossed paths this year so I began Spring baking early so that I could gobble down a few treats before Passover (which lasts 8 days) and celebrated on Easter with yummy chocolate instead of my usual baked treats.  But these cookies were so delicious they shouldn't (and for me won't) be confined just to Easter.

This Spring I've had a strong taste for sugar cookies but not the small thin hard variety that are the traditional Christmas fare. Instead I wanted the large thick soft type you see in bakeries.  So I searched out a new recipe and was very very happy with the result!  In fact this will be my future "go to" recipe even for Christmas cookies!

For the frosting I used the same frosting that I use with my Easter Sweet Buns which makes the perfect quantity.  I've shared it again below.

While these cookies aren't as thick and as large as bakery cookies they are a nice size, soft and delicious.  Try one. Or two. Or three.....  and I think you will agree.


Soft Sugar Cookies
yield ~ approximately 16 large cookies

3/4 cup unsalted butter (softened)
1 cup sugar (I use super fine baker's sugar by CH)
2 eggs
1/4 tsp vanilla
2 1/2 cups pastry flour
1 tsp baking powder
1 tsp salt

Steps:

1.  Cream butter and sugar.  Add eggs 1 at a time and mix slowly until well incorporated.  Stir in vanilla.

2.  Combine pastry flour, baking powder and salt.  Using a wooden spoon add flour mixture to butter mixture and stir just until combined.

3.  Flatten dough into a disk and wrap in plastic and refrigerate at least 1 1/2 hours.

4.  Preheat oven to 350 degrees at least 20 minutes before rolling out dough.  Cover baking tray with with either parchment paper or silpat.

5.  On a lightly floured board roll out dough to 1/4 inch thickness and cut into large shapes. Work quickly as this dough softens quickly.  You may need to periodically sprinkle dough with flour to prevent sticking.  Place cookies well apart as they will spread during baking.

6.  Bake 8 to 10 minutes until cookie is slightly firm to touch but not browned.  Leave on tray for half a minute before transferring to wire rack for cooling.

7.  When completely cool frost with Lemon Butter Cream Frosting!

Recipe slightly adapted from Charmie's Soft Sugar Cookies.


Lemon Butter Cream Frosting ~

Ingredients:
1 1/2 cups sifted confectionery sugar
1/2 cup sweet butter (room temperature)
1 tsp lemon extract or lemon oil
1 Tbs whole milk (scant)
Pinch table salt
Green Food Coloring

Steps:

1.  Beat sweet butter until light and fluffy.
2.  Add sifted confectionery sugar, lemon extract, milk (scant - you can always add a few drops more if you need it) and a pinch of salt and beat until well combined.
3.  Add a couple drops of green food coloring to desired intensity.
3.  Using a table knife frost cookies generously after they have cooled to room temperature.

After the icing sets you can store either in a tin between layers of wax paper or freeze.

This lovely splash of yellow is a bloom from my garden that I'm particularly proud of as, in general, a green thumb I do not have.


Until next time be well, love well, and enjoy spring with all its glorious color, rebirth and spiritual enrichment!

Monday, March 27, 2017

Crazy and Colorful Colorblock Socks

Of late I've been obsessed with knitting socks.  And I can't knit them fast enough.  I've also been knitting almost exclusively my own version of a plain vanilla sock that I'm sharing as a free pattern called Colorblock Socks (pattern link below).  It has all my favorite techniques.  Naturally.  But the the main unique feature is a helpful (hopefully) way to join new yarn seamlessly.  Because it is soooo much more fun to change colors and go crazy adding different yarns when you don't have a million pesky yarn ends to weave in.


With all the beautiful handpainted yarns there really is no need to do anything fancy when knitting socks.  Still.  It's nice to be able to personalize your socks so that they truly are one of a kind. You can achieve that unique twist by simply adding contrasting colored heels and toes.  Or you can go crazy and add all sorts of colors and stripes.  Socks are kinda like lingerie that way.  You can go crazy and nobody needs to be any the wiser.  Unless you want to show your wild side.


Speaking of going crazy with color I really loved knitting these Colorblock Socks. The yarn I used was purchased from Kate Selene a very talented dyer who creates beautiful and unique colorways.  I purchased one of her kits that included 20 small skeins of 10 yards each and every last one of the colors made my heart sing.  How can you not love that! And the socks are, in my ever so humble opinion, the perfect summertime sock both because of the sunny bright colors and also the light fingering yarn.  Last night was a cold and foggy spring evening here in Southern California and these socks kept my feet nice and cozy propped up watching TV.  And yet not too hot. Like Goldilocks I found these to be just right.


While my socks may look completely haphazard in color I actually did employ a color strategy. I spent a significant amount of time lining up the colors in two columns to see how the colors stacked up and how they looked lined up next to each other, making minor adjustments over the span of several days.  I ended up using 18 of the 20 colors in the kit and for the toes I went for a matchy matchy look in cherry red that I think helped tie them together as a pair. The cherry red yarn incidentally was a mini-skein from the same dyer but is not part of the kit.

I know a lot of knitters have been hesitant to dive into the colorful world of speckles and bright colored yarns. So don't dive in.  Dip your toes in with socks instead! You don't have to go crazy with mixing up colors all you need to do is pick a single amazing speckled color.  And if you really just don't like speckles and brights then don't worry my pattern will work just as well with any ho hum solid colored yarn as well.  Not that there is anything wrong with solid colored yarn.  And I'm sorry if I implied otherwise. No matter what yarn you choose I hope you will like and have fun with my Colorblock Socks Pattern!


Particulars:  Colorblock Socks, free pattern download, US 1 DPNs and 64 stitches; Scrappy Yarn Kit (Etsy seller Kate Selene) or small amounts of left over sock yarn.  This pattern is knit top (cuff) down and has instructions for two sizes, ie. 60 and 64 stitches.  If you prefer knitting socks "toe up" vs. "top down" then I suggest you consider Anna Johanna's Surprise Stripes Socks (free pattern on Ravelry). Anna is a very talented designer and writes the blog Where We Once Knitted.

Just to give you an idea of how this pattern looks knit up with different yarns, pictured below are socks that I knit using a self-striping yarn (Nomadic Yarns - colorway Banana Boat).  I also used this pattern to knit my Jolly Christmas Socks.  Both of these socks were knit on US 1 needles on 60 stitches using the shaping and construction of my Colorblock Sock Pattern and its yarn joining method (used to customize the heels and toes).  Incidentally I gifted the Nomadic socks to a dear friend who has had terrible health problems this past year.  She likes to wear them for her dialysis treatments because the hospital is so cold.  I had previously given her a pair of socks so I already knew that they meant a lot to her and that she liked to wear them to her treatments.  Socks are such a small thing but can mean a great deal to someone needing comfort in this world.


Joining New Yarn ~

This method is extracted from my Colorblock Sock Pattern and if you print the pattern it will include this method for joining new yarn.  But should you not need or wish to to see the pattern I have provided it here for your convenience.

Caveat.  This joining method is not intended for superwash yarns or yarns blended with nylon which inhibit felting. That being said with sufficient agitation it can be used with superwash and nylon blends ergo both my Nomadic socks and Jolly Christmas Socks are superwash blended yarns and yet I used this joining method.  It may not work perfectly with these types of yarns but it's still far better than the alternative, i.e. weaving in millions of pesky yarn ends.

This is a multi step process that takes a little practice but once you get the hang of it it will become second nature:

1.  Tie a knot joining the two ends of yarn that you want to join leaving approximately a 2 inch yarn tail on both sides. The knot I tie is a square knot, which is very easy to do and if you aren’t familiar with it here’s a video demonstration. Do not tighten your knot too much as you want the fibers loose enough to enable felting which requires friction and movement of the fibers against each other.  A properly felted "knot" should feel thicker than your regular yarn but not like a hard knot.


2.  Working each end separately, carefully untwist the 2 inch yarn tail into individual plies to open up and loosens the fibers.  Cut off roughly half of the loosened yarn plies roughly 1/2 to 1/4 inch from the knot, as shown in the picture above.

3.  You must now make one of two choices.  Choice No. 1: This choice creates a crisp color change, as shown in the picture above.  You lay the purple yarn ends back against itself and vice versa with the green ends.  With this method you will knit up to the point you want your color to transition, then tink (see footnote below) back 6 or 7 stitches and join your new color. Now when you knit with the joined yarn the yarn change should fall at the point you began tinking back. Choice No. 2: With this choice you create a marled yarn effect for a blurry yarn color transition.  I used this choice for my Colorblock Socks. You will lay the green plies/ends over the purple yarn and the purple plies/ends over the green yarn without any need for tinking or exact color positioning before adding your new yarn, although I prefer to do so on the bottom half of my socks.

4.  After both sides of the yarn plies have been prepared and positioned for either Choice No. 1 or 2, carefully lay the yarn in your left palm with the knot positioned in the center.  Now spit into your palm covering all areas of yarn that you want to felt.  Proceed to vigorously roll (i.e. twist) the yarn back and forth in your palm until the fibers felt together forming a seamless join.  Periodically open your palm and check to see if you need to add more moisture or if you need to adjust your yarn plies. I find it helps to twirl the yarn plies around the strand of yarn it needs to felt with.  You don't want it all bunched up near the knot.  The goal is to have the felted yarn to be only minimally more bulky at the join than otherwise.

As I said at the start this method can take a bit of practice but once you get the hang of it you will find it very easy and secure join.  I've used this method for many years and it's the only way I would consider joining new yarn with socks.

Footnote:  "Tink" is slang for undoing your knitting one stitch at a time. It is the word "knit" spelled backward - hence you "tink" instead of knit!

Until next time be well, love well and this summer why not knit some crazy and colorful Colorblock Socks for yourself!

Monday, December 19, 2016

Old World Gingerbread House and Snow Queen Scarf


Food is an important part of the holidays for me.  It's not like that for everyone.  I've actually met people who don't recall any special food from their childhood associated with the holidays other than that they had a turkey dinner.  My Steve is one of those people.  It's taken us a long time but after 30 years together we've come up with some wonderful food traditions for our holidays and without a doubt building a gingerbread house at Christmas is at the top of our list.

The origins of our tradition began with a trip to Chile many years ago and our stay at the Hyatt Hotel in Santiago where in lobby they had an actual gingerbread house (made of cookie dough and frosted) that you could walk inside and from which they sold individual gingerbread houses and cookie boxes. During our stay we consumed several of these delicious houses in an embarrassingly short period of time and have been left wanting more ever since.


And it remained just a wistful reminiscence until Steve suggested that we try making our own gingerbread house.  And so we did.  With a success that has left us giddy with delight and has amused us in the process more than I can say. There is something very fun about frosting and decorating a gingerbread house that will bring out the kid in everyone. Just you wait and see.

The most important part of making a gingerbread house is to use a wonderfully rich and flavorful gingerbread  because a large part of the fun is eating the house.  And when I thought about it I realized that I already had the perfect recipe that I had been using to make gingerbread men for many years. This recipe works beautifully to construct a gingerbread house and makes exactly the right quantity and it is so so so much better frosted and coated in candy!


A couple of housekeeping points before I get to the recipe.  It's best to plan on making your gingerbread house over two days, although it can be made in one.  I recommend that on the first day you make the gingerbread dough, let the dough chill, and bake the individual house pieces.  On the second day you can make the royal icing and decorate the house.  I like to ice the entire house as it will keep the gingerbread fresh and tastes wonderful.

Old World Gingerbread House Recipe ~

Gingerbread Dough:

1 C. shortening
1/2 tsp. salt
3 tsp. baking soda
2 tsp. ginger
2 tsp. cinnamon
1 tsp. ground cloves or allspice
(note: if you like a lot of spice you can increase the ginger and cinnamon by 1 tsp and and the cloves by 1/2 tsp.)
1 C. granular sugar
1 C. molasses
2 beaten eggs
1 tsp. instant coffee moistened in a little hot water (I use espresso powder)
5 C. All purpose flour

Royal Icing:

1 lb. sifted confectioners sugar
3 egg whites
1 Tbs fresh lemon juice or 1/2 tsp. cream of tartar

Suggested Decorations:

Candy Canes (You can use them whole or crush them for sprinkles)
gum drops
skittles (original soft style work best)
multi-colored sprinkles and sugars
Avoid unwrapped hard candies that will melt in the frosting

DAY 1 ~

Prepare the Dough Steps:
1. Cream first 6 ingredients;
2. Cream in sugar and molasses;
3. Add in beaten eggs and coffee (or espresso);
4. Add flour 1 cup at a time. After adding 3 cups stir in the last 2 cups by hand.
5. Allow dough to chill in the refrigerator several hours or until it's easy to handle.

Baking Steps:

1.  Preheat oven to 325 to 340 degrees (I generally preheat to 340 degrees) and prepare baking sheets by covering with parchment paper or silplat.
2.  While oven preheats download a gingerbread house template.  I highly recommend the free King Arthur Template. I divide the dough into half and I use a full half of the dough to make the 2 sides of the house.  I then divide the remaining dough into 4 pieces to create the roof (2 pieces) and the ends (2 pieces).  You want to divide the dough like this so that you use all your dough and that way you know your house is of the right thickness.  I typically have only enough scraps left over to make a small gingerbread man.  This style of gingerbread is meant to be thick and if it is too thin it will be dry and not as enjoyable to eat.

3.  Bake approx. 18-20 minutes (with my oven I generally preheat to 340 degrees and bake for 18 minutes) and cool on a wire rack.  You can then proceed to setting up and decorating your house or wrap the pieces well (air tight) if you plan on decorating the next day. If you intend to wait longer than a day to decorate I would freeze the house pieces until you are ready to keep them as fresh as possible.

DAY 2 ~

1.  Prepare a surface to construct your house.  I like to use a cutting board but any flat surface will work.  Lay out your gingerbread house pieces and find some soup cans that can be used to stabilize the house while it sets.  Before preparing your icing review the entire King Arthur Template for tips on how to set up your house.

2.  Preparing Royal Icing as follows*:  whip eggs whites until creamy and add either lemon juice or cream of tartar. Then add powdered sugar and whip until soft peaks form.  At this point I recommend you remove 3/4s of the icing and place into a sealed plastic bag (sealing the plastic bag will keep the icing soft) to use later for icing the house.  The remaining 1/4 amount of icing should be whipped until stiff peaks form (the longer you whip it the faster the icing will set and the harder it will dry). This firmer and fast setting icing is used to set up your house.  Scoop this icing into a small plastic bag and make a small cut in one corner which can be used to pipe out the icing as needed. Now follow the assembly steps in the King Arthur Template.  Once your house is assembled allow it to set 2 to 3 hours (or until firm) before icing and decorating.

3.  When your house is set use the icing you set aside earlier to ice all surfaces (icing all surfaces will keep the gingerbread fresh longer) and quickly decorate before the icing sets.

4.  Allow decorated house to set for a minimum of 8 to 12 hours (the longer setting time is needed because you are using a softer icing which is more enjoyable to eat that the firm icing used to set up the house).

*Alternative icing options:  1)  You can make two batches of icing.  The first batch (whipped until firm peaks) can be used to set up the house and the second batch (whipped to soft peaks) can be used to ice and decorate the house; 2)  If you are pressed for time you can simply use the firmer icing to both set up the house and decorate the house, but I don't recommend this as the firmer icing isn't as enjoyable to eat as the softer icing.

I hope this will become part of your family Christmas holiday traditions!

Adapted from Yankee Magazine recipe for Gingerbread Gentlemen (1993 issue).

Snow Queen Scarf


Before it gets lost in the shuffle I wanted to quickly share this scarf knit in a thick opulent combination of silk and wool, that makes me feel positively queenly when I wear it!  I purchased this yarn as a club offering several years ago from The Verdant Gryphon and the designer/dyer took her inspiration from The Snow Queen, one of Hans Christan Anderson's well known fairy tales. Although not nearly as well known as The Little Mermaid.  If you are not familiar with his work, all of his fairy tales are sad but they are beautifully told to reveals how through acts of kindness or selflessness anyone no matter how far they have fallen or how lowly they are in this world can achieve redemption. A thought provoking and interesting subject to explore no matter your age and is one reason his stories are worth telling and retelling through the ages.

While I chose not to use the design that came with this club offering I absolutely love the yarn and am also glad that I have the beautifully illustrated copy of The Snow Queen that came with it.  As always these clubs are risky as you have no idea what color, pattern and notions will be sent.  That being said I have rarely been disappointed in a yarn club.

Particulars:  Saroyan (free pattern) designed by Liz Abinante (Feministy.com); US 9 needles; 2 skeins The Verdant Gryphon, Codex (worsted 52% silk/ 48%wool 234 yds/113g per skein).  My only modification was to use 2 colors instead of a solid color.  To knit this using 2 colors simply twist the yarns intarsia style.  To maximize the amount of the light blue color I knit the entire edging in the contrasting color instead of simply the leaf.  Lightly blocked dimensions 66" x 10" (at widest point).

Wishing You a Merry Christmas ~


With the success of his calendar shot Simcha announced that he's available for kisses and autographs. For a price. Le sigh, despite our best efforts he still has a working dog mentality.

Until next time be well and love well and from all of us at The Knitting Blog by Mr. Puffy the Dog, we wish you a very Merry Christmas and Happy New Year!

Monday, May 30, 2016

Multi colored shawls and Testing Yarn for Color Fastness


I can't stop knitting multi-colored shawls.  I'm not sure why they have captured my love recently because it's not as though I haven't knit multi-colored projects before.  I think a lot has to do with the proliferation of gorgeous mini-skeins sets that are popping up everywhere.  Who can resist mini skeins?  This beautiful selection of mini-skeins was dyed by Hedgehog Fibers and is the first shipment of Simply Sock Yarn's 2016 club.  And you know how I love clubs, risks be damned!  Although I am struggling with how to make a certain club skein of multi-colored neon sock yarn work for me...


But before I talk about how much I love this shawl and this yummy confection of minis, I want to talk about knitting with multi-colored skeins.  As gorgeous as these projects are they are not without their risks and certain steps need to be taken to ensure that your work of art will survive washing without color migration/bleeding destroying it.  This is particularly important if you use a light colored contrasting yarn.  And while commercial yarns seem to be less susceptible to color bleed it can happen with any yarn no matter the dyer and I don't know of any indie dyer that won't acknowledge that color bleed can occur with their yarns.  Parenthetically, if you are knitting with a yarn and notice that the dye is coming off on your needles or hands this is a huge red flag you will have a color bleeding issue.

The following are my tips for working with multi colored yarns with the caveat that they are not a guarantee that you won't have a color bleeding disaster.  They are simply common sense recommendations and tips that I've picked up from various and sundry sources and are intended to reduce the likelihood of color bleed.  You should always consult and follow the recommendations of the yarn manufacturer (or dyer) to ensure the best result. 

Tips to Reduce Chances that Color Bleed will Spoil your Project:

1.  Before winding, knitting, or doing anything at all to your skein of yarn soak the skein in a basin of cold water to check for color fastness.  Do not use hot water and/or soap (including a wool wash) as both can contribute to dye leaching.   Before I immerse a skein in water I like to add additional yarn ties to the skein to help prevent the yarn from tangling and becoming a headache to wind later and also try not to agitate the yarn more than necessary.  If you see that the color bleeds but without an excessive amount of color pouring off the yarn (i.e. enough that the color of the yarn is changing) then this is just your typical excess dye that is rinsing out.  Repeat the soak and rinse cycle until the water runs clear.  If instead your yarn is losing profuse amounts of dye and the yarn is changing color then the dye is not set and you need to contact the seller for the best method to set the dye (this usually involves heat and vinegar) and sometimes the dyer will want to (or offer to) do this themselves.

2.   For it's first soak after you have completed knitting your project, use cold water (without either soap and/or wool wash) and toss in a sheet of dye catcher.  I use Shout ColorCatcher dye-trapping sheets which are very popular with quilters who also have to be careful about color bleeding.  If you feel you must add soap and/or wool wash then do so right at the end just before you rinse to reduce the likelihood that it will leach dye from the yarn and/or allow the dye time to migrate but still give it that fresh smell and feel that we all love.

3.  If your project does not require an aggressive block then there is no reason for a long soak which increases the chances that dye will migrate and stain adjacent yarn and/or lighter colors.  A quick dunk is all that is needed unless you need an aggressive block and a long soak to ensure the fibers relax fully in which case you have to take the risk.  But many of the patterns using multi-colored yarns are garterstitch shawls and unlike lace don't require a long soak so simply don't do it.

The most important tip is obviously to soak the yarn and check for color fastness before knitting your shawl, which can't be repeated often enough.  But just like knitting a gauge swatch no one wants to take the time to do it. However if you have seen some of the wonderful projects that have been ruined because of color bleed then you will take the time as I do.  For an example of an epic fail here's a link to a Doodler shawl on Ravelry. 


And finally a little about this fantastic shawl which is one of my favorites. Ever ever ever. It was designed as a two colored shawl but I saw no reason it shouldn't work beautifully with my set of 5 mini-skeins in contrasting colors paired with a cream colored skein of yarn.  And I was really lucky because fortuitously the pattern elements coincided virtually dead-on with my yarn minis so that there was a natural break in the colors when the design element changed.  This helped because I used all but a negligible amount of my colorful minis although I did have to fudge some of the design to make it work as perfectly as it did  at the end! 


Particulars: Enfilade a Maliha Design by Lisa Hannes; 5 Hedgehog Fibers Mini skeins (20g/87yrds) (first of three monthly shipments in a mini club sold by Simply Sock Yarn); 1 skein (colorway Antler) Sun Valley Fibers 80/20 420 yds; US 4 Circular needles.  Modified patterns to use mini skeins rather than a single contrasting color.  I also slightly modified the use of the contrasting color, particularly at the end when I knit the lilac and dark blue without any contrasting stripes.  This is a very fun and easy pattern to knit and as you can see easily adaptable to multiple colors.

Jordana Paige Bella Bag ~


I was absolutely thrilled to receive this beautiful Jordana Paige knitting bag as a prize for the Breaking Bad Shawl KAL.  I remember seeing these bags advertised in knitting magazines and thinking how beautiful they were.  Now that I have actually used this bag I am in love with it.  It's super tactilely appealing and very stylish and looks just like any other gorgeous hobo bag except that it has lots of pockets and room to stash your yarn and notions. I took this bag along with me on a recent weekend trip and it was perfect and I realized how wonderful it was not to have to juggle both a purse and a knitting bag and still have everything I wanted with me. How cool is that?  

Having just discovered how cool these bags are I was very sorry to learn that Jordana Paige is closing her business. I hate to see a terrific product like this disappear and with it yet another small independent yarn related business. Jordana wrote a really lovely piece that explains her decision to close her business and thanking her customers that you can read on her website.  I also understand a few of her bags are still available.   

What Up Next?


Over the summer months there will be a shift in projects away from shawls (which I have really enjoyed wearing and knitting this cooler than typical Spring in California) to smaller and more portable and summer friendly knits.  I wish our weather remained cool all year around, but that is not the way it works.

Until next time be well, love and and have fun exploring the many possibilities that the mini skein invasion brings! 

Wednesday, December 21, 2011

The Year of Handspun

My first post of the year was a handspun project so it is only fitting that my last post this year is also using handspun.  Curious because prior to this year I had never knit anything using handspun and then for whatever reason it suddenly captured my attention and I've knit four projects this year with it (Handspun Scarf, Pamuya Shawl, Fingerless Mittens and this scarf).  Now I'm hooked on handspun and of all the many things that I've knit over the years, these projects are my favorites.


Before I tell you about this scarf, I'll tell you about the above picture.  It is taken in front of an old ruined cabin where only the rough hewn stone chimney remains.  I "discovered" this ruin with Simcha on one of our morning hikes.  I had shimmied up a mountain slope following what I believed was a trail only to have misgivings about half way up when I began to suspect what I was following was actually a watershed.  Parenthetically, it's moments like this when you look around and realize it's a steep climb up or a slippery slope down that the thought crosses your mind that it might be a while before your body is found if something bad were to happen.  But I managed to work my way to the top (Simcha had no trouble as he climbs like a mountain goat and I appreciated when he worked his way back down to encourage me on - we were in this together) where we then picked up a trail along the ridge that lead to this ruin.   How cool is that?  I love our morning hikes.


I also love my morning hikes for another reason, namely, they provide me with an infinite number of excuses as to why I need more yarn!  I can always rationalize a purchase with "I really need this to make something to wear on my morning hike.  It is cold, you know, early in the day."  See how well that works?


And this yarn was a splurge purchase where I used exactly that excuse.   It is a lushes heavy worsted alpaca in multi-color and it wasn't cheap but it's fabulous.  And, as is the case with most handspun yarns, they really rock in a simple design that focuses on texture.  You don't need to gild the lily here as the beauty is in the yarn.  A simple broken rib pattern with a fun ruffle edging and you have the perfect scarf to walk your dog any ole day of the week ~


Particulars:  1 skein Cherry Hill Alpaca, LLC (multi colored alpaca - dark) spun by Pam Wilkins, 6.5 oz 247 yards.  I used a free pattern (Misti International Ribs & Ruffles Scarf) as modified by using US 8 needles and fewer pattern repeats.  Finished scarf measures 4"x 64"


I threw in this last picture so you could see how the yarn looked still in a skein.  You can generally not tell from looking at a skein of handspun how it will look when knit up, and the bold blocks of color in this scarf just flowed naturally and were unexpected.

Peace on Earth

Mr. Puffy's Knitting Blog wishes everyone the gift of peace on earth this holiday season and all year long.


Decking the halls is exhausting work so follow Simcha's example and take plenty of time to relax and take naps.

I leave tomorrow and will be away through New Year, so until next time, be well and love well and have a happy and safe holiday season!  Steve, Claudia and Simcha xoxoxo