Showing posts with label Recipes. Show all posts

Sunday, February 18, 2018

Hat Topper Fun and Lucille's Red Cake Recipe ~


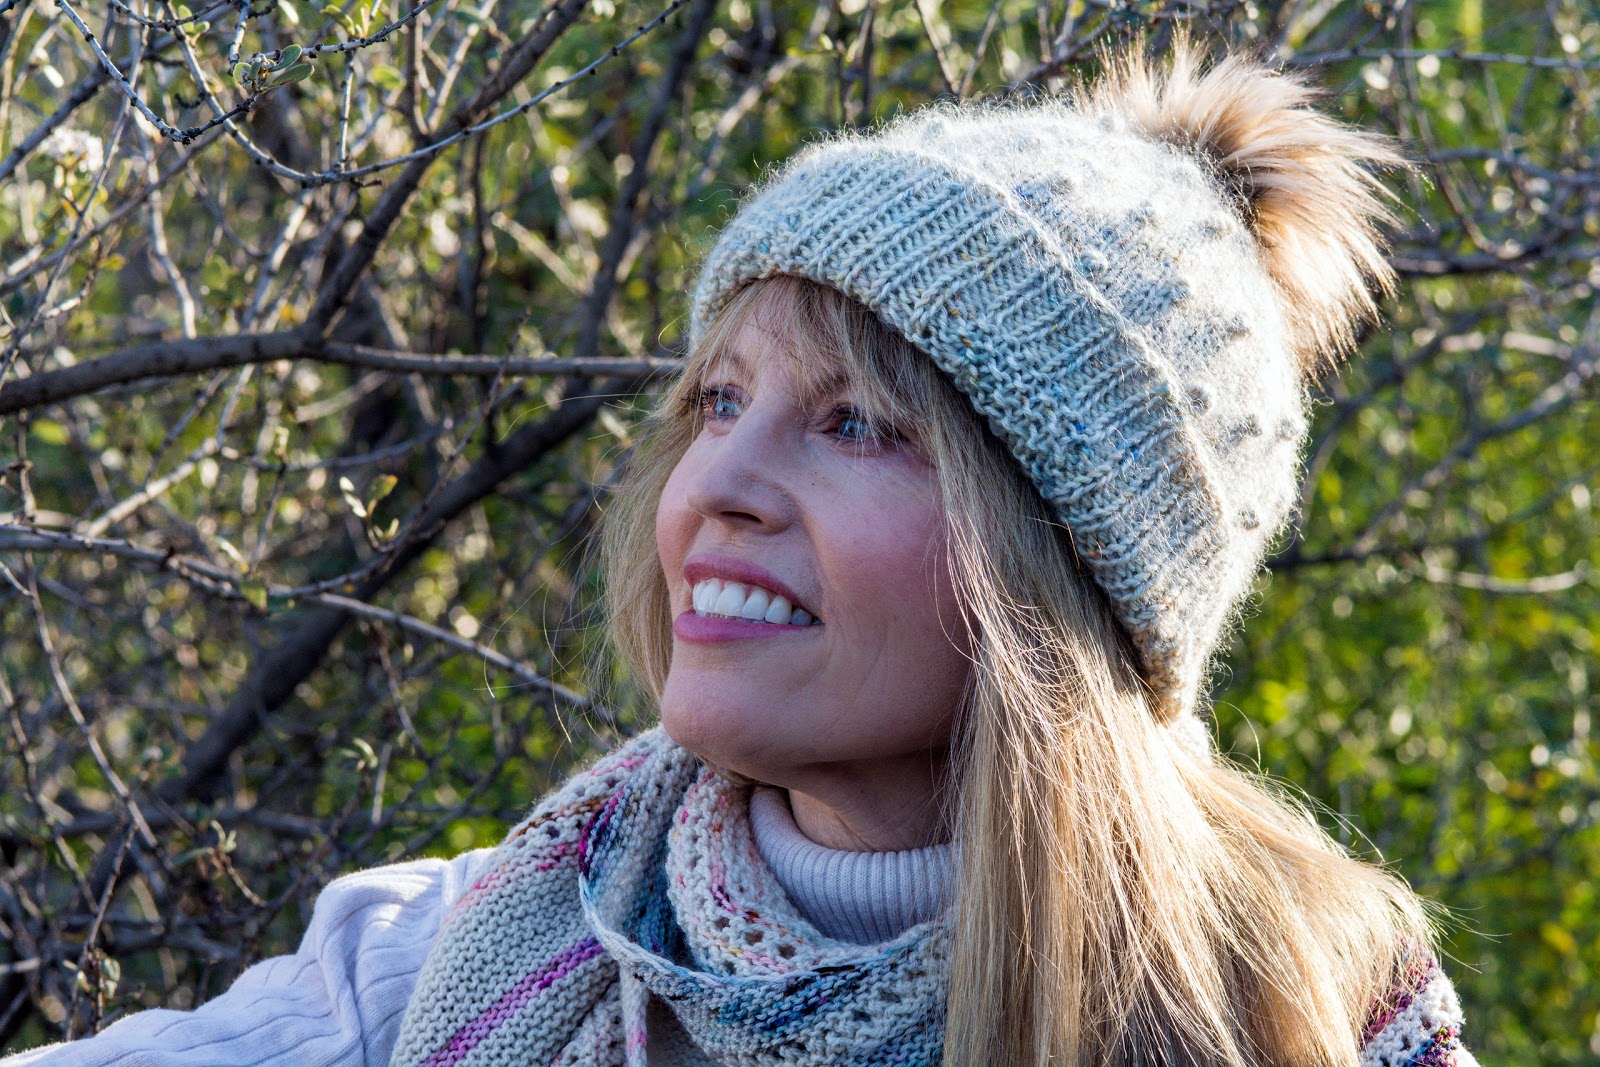
I've knit a lot of hats over the years but my new Kobuk hat has to be a favorite.  It might be the gorgeous yarn which has both silk and mohair making it warm and luxurious, or maybe it's the perfect wintery color, or perhaps it's the fun hat topper, or maybe it's a combination of all three!  It also has a really cool brim design that appears to resemble a crown that shows when the brim is turned down and worn slouchy style.  Which unfortunately you don't see too well in my pictures for the simple reason that the hat was easier to photograph with the brim turned up!  That being said the slouchy look with the brim showing is a cool look and I'll probably knock around wearing it that way too. No matter how you style it this is a great hat to have in your wardrobe.


I hope you noticed the cute hat topper!  This is my first time buying a hat topper instead of simply making a pom pom using leftover yarn.  Hat toppers are super on trend right now and I was curious whether I would like it better - and I do!!!  I think the hat topper gives the hat a more modern and finished look and I'm going to pick up another couple of colors and styles to have a selection to switch up depending on the accent color I want.  How will I do that?  I read on a Rav forum that some hat toppers come with a snap closure which makes it easy to change them.  But not all hat topper come with a snap closure and mine didn't.  Instead I read where someone suggested sewing a button to the inside of the hat to which a hat topper can be tied on and off.  And that's what I've done.  To do this I recommend you select a medium sized button that is plastic and light weight so it is large enough to wrap the topper ties around while being washable and not so heavy that it will drag the hat down.  This makes it easy peasy to have a wardrobe of hat toppers to switch around!


Particulars: Kobuk hat designed by Caitlin Hunter (Boyland Knitworks); knit using the Top Hat Set dyed by Lay Family Yarn (kingfisher colorway) yarn set includes 2 coordinating yarns (1 skein DK 55% Blue Face Leicester 45% silk (100g) and 1 skein 72% fine kid mohair and 28% silk).  I used a Faux Fur pom pom in colorway creme brulee sold by The Burlap Kitchen.  This a super easy and fun hat to knit.  I used the Twisted German Cast-On for a stretching brim and I only knit through the upper (bobble) chart one and a half times to create a less slouch as I have a small noggin.  Caitlin Hunter is a terrific designer and I have recently finished one of her sweaters that I can't wait to show you!

Incidentally the shawl/scarf that I'm wearing in these pictures is Enfilade by Lisa Hannes that I blogged as Multi Colored Shawls and Testing Yarn for Color Fastness.


Lucille's Red Cake Recipe ~
Steve's birthday comes early February and every year I bake him a birthday cake of his choice.  He's chosen a variety over the years but he most often he requests his mother's Red Cake Recipe that she would bake for him when he was a boy.  Lucille, his mother, graciously shared her recipe with me so that I could bake him the exact cake she made.  It's not a typical red velvet cake as Steve doesn't like chocolate so there's less cocoa and it also doesn't seem as heavy and rich as some red cakes I've eaten.  But it is light, colorful and perfect with a scoop of vanilla ice cream.  In other words it's a quintessential old fashioned birthday cake.  I'll conclude with what she wrote on the bottom of her recipe card "Good Luck!"


Lucille’s Red Cake Recipe

Yield ~ 9" double layer cake

My only adaptation of Lucille's recipe, if you will, is to add violet icing color.  Sans icing color the frosting is antique white.  

Ingredients

For the Cake

1/2 cup (1 stick) of unsalted butter, softened
1 & 1/2 cups granulated sugar, (I use superfine baking sugar)
2 large eggs, room temperature
2 tsp cocoa powder (use natural cocoa and not dutch process)
1 ounce red food coloring 
2 & 1/2 cups of cake flour (sifted before measuring)
1 tsp salt
1 tsp of baking soda
1 tsp white vinegar
1 cup buttermilk, room temperature
1 tsp pure vanilla extract

For the Frosting

3 Tbs all purpose flour
1 cup whole milk
1 cup (2 sticks) unsalted butter, softened to room temperature
           7/8 cup of granulated sugar
1 Tbs pure vanilla extract
Icing color (optional - cake is an antique white otherwise) I use Violet Icing Color by Wilton

Instructions

Cake:

Preheat oven to 350 degrees F. Prepare two 9-inch cake pans –either line bottom with parchment paper and butter sides or butter and flour entire pan. 

In a large bowl, cream together butter and sugar until light and fluffy - do not rush this process - beat at least 4 minutes.  Add eggs, one at a time, beating well after each addition.  In a small dish make a paste using the cocoa powder and a small amount of food coloring.  Add to butter mixture and beat well.  Add the balance of food coloring beating well.  Then add flour (mixed with salt) and milk alternately (roughly 4 additions) beginning and ending with flour.  Beat in vanilla.  Lastly combine vinegar and soda in a small dish (it will foam up) and gently stir vinegar mixture into batter, mixing well.

Pour into cake pans and bake at 350 degrees about 30 minutes, or until a tester comes out clean. Let cool in pans 5 minutes, then turn out onto a cooling rack to completely cool before frosting. 

N.B. As soon as cake is out of oven I like to begin preparing the frosting (which takes a little while because you have to heat the milk and flour and allow time for it to cool, etc.) and you want to frost your cake as soon as it has cooled so it will be as fresh as possible.

Frosting:

In a small saucepan whisk together flour and milk until blended and cook over medium heat, stirring constantly until mixture thickens. Set aside to cool.  You can set pan in a basin of cool water to speed along the cooling process.

In a larger mixing bowl cream together the butter and sugar until light and fluffy.  Then add 1 Tbs of cooled milk and flour mixture to sugar mixture, beating well.  Gradually add the rest beating all the time.  Beat in Vanilla.   If you choose to use icing color add it at this time, beating well. The texture of the frosting is similar to whipped cream.   As soon as cake has cooled begin frosting.

Serve with vanilla ice cream.

Good luck!

Until next time be well, love well, and have fun with hat toppers!!!

Saturday, December 16, 2017

Winter Hat and Holiday Cookies

Do you see anything wrong with this picture?  Living in Southern California I don't have any snow balls to throw!  But I do have bath bombs that look remarkably like snow balls!  Yes?  If you live where it snows for sure you will want to throw snow balls.  Obviously.  And you certainly need a cute winter hat to do that.  But even if you don't live where it snows it's still fun to have a cute winter hat!


Long ago I lived in the midwest (Indiana) where it actually does snow.  I've made snow angels, thrown snow balls and slid my car off the road in a snow storm.  I can remember mornings scraping thick ice off my windshield, the magic of freshly fallen snow, snuggling under an electric blanket and drinking lots and lots of hot cocoa.  And I loved it all.  Except the part about sliding off the road.  In a year like this where there is virtually no winter at all in Southern California I particularly miss those times and how the holidays seemed so much more special with snow on the ground.


But you want to hear about the hat! This is a super fast and fun knit.  I purchased it as a mystery KAL kit.  I chose the main color (blue) and the designer picked the contrasting red and white colors.  I think she made a perfect choice and left to my own devices I'm not sure I would have done as well.  Lately I've seen a resurgence in color work popularity.  In particular there are some gorgeous color work yoke sweaters that are showing up online (I have the Sunset Highway Sweater on my needles).  Color work projects are a lot of fun but can be intimidating if you haven't tried it before.  If you are considering color work my advice would be to practice, practice, practice until you get comfortable knitting holding two yarn strands and are able to knit with an even tension.  There are a number of ways to hold the yarn but I prefer to hold the background color over my index finger with the pattern color over my middle finger.  You can find any number of free youtube videos demonstrating ways to hold the yarn.  Try out the various methods and see what works best for you.  And practice, practice practice.  Once you get the hang of it you will find that you can knit almost as fast in two colors as one.  Incidentally I have a super easy way to deal with floats that I'll share when I post my Sunset Highway sweater, which might be next month or next year depending on my fancy.


Particulars: Stranded in Toronto hat kit; designed by Cindy Garland (Raverly Group:Wild Prairie Knits); Stunning Strings Studios, Simply DK (purchased as a kit);  US 7 needles for both brim and the body.  I delayed beginning the decreases for 2 rows to give it a little extra length.  I love this yarn - very soft and warm - although as a single ply I'm not sure how well it will wear.   Previous color work projects that I've blogged include BaaBle Hat, Hebe Hat, and Osebury Scarf.

In case you are wondering the scarf that I'm wearing in the photos is my Good Vibes Shawl and the mittens are my Snowflake Fingerless Mitts.  Both get a lot of wear!

Holiday Cookies ~


The holidays are fast approaching and there are a million things that need doing.  I know that.  The house needs to be decorated, presents need to be purchased and wrapped, and everywhere you go you need to bring a dish or a dessert.  But in all that rush don't forget the quaint tradition of leaving a plate of cookies out for Santa on Christmas eve who surely deserves a treat.  And since I'm Santa in this household, ho ho ho, that means baking a cookie just for me.  And if I there is one cookie that I especially enjoy at Christmas it's the Nick of Time cookie and that's the recipe that I'm sharing with you.  Just in case there's a Santa in your household who likes cookies too.

I would describe this as a rustic cookie with a nice crunch that is chock full of cranberries, white chocolate and pecans.  In other words a typical American cookie.  Admittedly sweet, every bite tastes like a holiday party in my mouth.  I look forward to them once a year.  I hope you will enjoy them as much as I do.

Nick of Time Cookies
~ yield ~ 3 dozen cookies (4 inches across)

Ingredients:

1 cup very soft butter
1 cup packed light brown sugar
3/4 cup granulated sugar (I use super fine baking sugar)
1 tsp salt
2 tsp vanilla
Orange zest, from a large orange
1 large egg at room temperature
1/2 tsp baking soda
2 3/4 cups All purpose flour
1 1/2 cups white chocolate chips
1 1/2 cups dried organic cranberries, if whole roughly chopped
1 cup pecans, roughly chopped (I use elliot pecans)

Steps:

1. Line a baking sheet with parchment paper and preheat the oven to 350 degrees F.

2. Combine soft butter, sugars, salt, vanilla, and orange zest in a large mixing bowl.  Mix on medium  speed until well combined (mixing 3 to 5 minutes minimum).  Add egg and mix on low speed until fully incorporated, scraping bowl sides as needed.  Remove mixer from stand.

3.  In a separate bowl combine baking soda and flour.  Add flour mixture to wet ingredients and stir with spoon until just combined.  Stir in white chocolate chips, cranberries and pecans.

4.  Drop large tablespoon sized cookies onto parchment paper (slightly flatten with fingers or back of spoon).  Bake in preheated oven (350 degrees) for 12 to 14 minutes.  The edges should be set and just slightly brown on bottom but the tops should not be browned.  It's important not to over bake.  Remove cookies from the oven and allow to continue cooking on sheet for 5 minutes.  Remove to wire rack to finish cooling.  Store in air tight tin or freeze.

Slightly adapted from the original version of the King Arthur Flour recipe for Nick of Time cookies since renamed and modified as cranberry-orange white chocolate Drops.


Southern California Wildfires

I want to briefly address the wildfires that have been on the news. If you are not already aware we are having terrible wildfires raging in Southern California which are ferociously consuming our dry parched terrain and everything in its path.  So I've found it hard to feel jolly and in the Christmas spirit this year.  My heart is heavy thinking of all the brave fire fighters on the front lines, poor terrified animals, and of course families who loose everything.   A sobering reminder how quickly events can happen that forever change our lives.  With regard to the Thomas fire at this time it looks like my sister's home (in the foothills of Carpinteria) will be spared but my parent's home (in the foothills of Santa Barbara) has just been moved into mandatory evacuation status.  Even the newscasters are asking for prayers for a break in the weather.  The red flag warnings continue throughout the region and there is no rain in the forecast.


Until next time be well, love well, and Happy Hanukkah and Merry Christmas to all who celebrate and remember to grab hold and hug all your loved ones.

Saturday, October 7, 2017

Solstice Cardigan and Honey Roasted Pecans!

This is my "Rhinebeck" sweater.  Snicker.  Yeah, I know that I'm not going to Rhinebeck but I'm still calling it my Rhinebeck sweater.  To explain, if you are a knitter then you've probably heard of the fabulous  extravaganza of sheep and wool called Nys Sheep and Wool Festival that takes place late October in Rhinebeck, New York (commonly known as "Rhinebeck").  In any event it's the mecca for knitters and over the years it's become quite "the thing" to wear a new handknit sweater to the event called your Rhinebeck sweater. I wish I was going to this or any yarnie event.  But I'm not nor am I ever likely too.  Because apparently I'm waiting for one to come to Topanga, California.  I suspect I'll be waiting a long time.  But I can still have a "Rhinebeck" (sic. fall) sweater and you can too.


Over the years I've knit a number of sweaters, some pullovers, some short sleeve, and a few cardigans and hands down my cardigans get the most wear and enjoyment.   I've found that my sweet spot for sweaters are the chunky cozy sweaters that are squishy and make you feel warm and toasty and impervious to the cold.  Just like this one.  It's an aran weight a a little heavier than any others I've knit but that's what makes it a great outer layer sweater.


To be honest while this sweater was on the needles I had begun to worry that I had made a mistake in selecting this pattern.  It felt and looked like a boring blob of yarn that I was lugging about.  But I persevered.  In for a penny in for a pound I always say.  And I had bought the yarn to go with this pattern so there must have been something about the project that had spoken to me.  And of course once the sweater came together I knew why I had chosen it.  It has wonderful texturing going on and has a quaint vintage style that is easy to wear and will be perfect for running errands or simply to hang out sipping a steaming cup of coffee.  Did I mention it feels fabulous on?


If you read this blog then you know I'm partial to knitting shawls and accessories.  After all I live in a very warm climate (southern california) so I don't have a lot of  cold weather to justify knitting too many sweaters but we do get some cool and down right cold days November through January so it's nice to have a new sweater in the fall.  I'm glad that I picked this one for 2017.


Particulars:  Solstice Cardigan by Cecily MacDonald; 6 skeins Quince & Co., Osprey (lupine colorway); US 10 1/2 circular needles. This is a wonderfully written and easy to follow pattern, although I did find the “faux” cable (running down the shoulder and sleeves) confusing at first. I think the instructions would have been cleared if stated as follows:
Row 3: Sl 4 wyb droppping all yo’s. Using the point of LH needle pass the first 2 stitches over the second 2 stitches LEAVING THESE STITCHES ON THE LEFT HAND NEEDLE. Transfer the 2 remaining stitches on the right needle to the left needle. Now that your stitches are crossed knit them in this order.
Hopefully this will help someone else also confused by the faux cable instructions.  Other than that the pattern is very easy to follow.  There are optional pockets that I skipped and I did tack down the collar to prevent it riding up.

If you are interested in cardigans (versus pullover sweaters) previous posts with a cardigan include Little Waves, Flo, Cabled Riding Jacket, Bud, Exquisite Cardigan, and Rowena.

Honey Roasted Pecans!


Some say that I'm a nutty person so it shouldn't be a surprise that I enjoy eating nuts.  I use them a lot in my baking and I also eat a fair amount raw but my favorite nuts are those that have been roasted.  As fall is a time to celebrate the harvest gathering for winter I thought this would be the perfect time to share a favorite recipe for roasted nuts.

This is a recipe for roasted pecans and before getting into the nitty gritty of the recipe it's important to clarify the type of pecans to use.  For baking no question I always use elliot pecans because of the wonderful flavor they add to baked goods. Over the years I've purchased elliot pecans from Sunnyland Farms (wonderful quality, but their prices have gotten pretty high) so this year I purchased my pecans from Pearson Farms and I am very happy with their quality too.  Incidentally pecans freeze extremely well so don't worry about the quantity of nuts you purchase. But for this recipe I like to use the variety of pecans that you generally find in a grocery store and Costco carries them at a very good price which is handy because this recipe is very addictive and you can go through a lot of pecans!  Honey roasted pecans are wonderful tossed in a salad (try them in my holiday salad!), added to a bowl of popcorn, chopped up and sprinkled on top of oatmeal, or simply by the handful.  There are endless ways to enjoy them!  Oh, and before I forget, packaged prettily they make great hostess gifts too.

Honey Roasted Pecans
~ yield ~ 4 cups

Ingredients:
4 cups pecan halves
3 Tbs. honey (I like a warm flavored honey and use Trader Joe's Turkish Honey)
2 tsp. sugar, divided
3/4 tsp. curry powder
1/4 tsp. ground cinnamon
1/2 tsp. coarse kosher salt

Pan preparation:
Aluminum Foil
Non-Stick cooking spray (I use pure olive oil)

Steps:

1.  Preheat oven to 350 degrees and line a roasting pan with aluminum foil and spray with non-stick cooking spray.

2.  Add pecans to a large mixing bowl and drizzle with honey.  Mix well to coat all pecans.

3.  Evenly distribute pecans on prepared roasting pan.  If you see any nuts that somehow aren't covered well with honey drizzle them with a dollop of additional honey before sprinkling tops of pecans with 1 tsp. sugar (do not stir).  Roast for 10 minutes.

4.  Remove pecans from oven and stir well.  Sprinkle top of pecans with remaining 1 tsp. sugar, 3/4 tsp. curry powder and 1/4 tsp. ground cinnamon. Roast for 2 minutes more.  Total roasting time is 12 minutes.

5.  Remove pecans from oven and allow to cool 10 minutes in the pan before transferring to non-stick parchment paper or silpat to finish cooling.  I transfer the nuts while still warm because I find that when I leave them to cool completely on the foil they have a tendency to stick to the foil.

6.  Once the pecans have cooled sprinkle them with 1/2 tsp. coarse kosher salt.

7.  Store in an airtight container.

Adapted from Southern Celebration's Spicy Honey Glazed Pecans.

Although it has nothing to do with pecans I had to share this picture of Steve and Simcha because it captured my heart.  It's taken on a Friday night as they prepare for Shabbat which for the Jewish religion is on Saturday.  Simcha loves to keep Steve company as he studies and he's also a big fan of his guitar playing too.  As am I naturally!


Until next time be well, love well and have fun picking out your Halloween pumpkin! And for those of you lucky enough to be going to Rhinebeck, or any fiber festival have a wonderful time and take lots and lots of pictures!!!

Friday, July 7, 2017

Summer Garden Shawl and Carrot Cake Recipe

We are back from Israel and had an amazing time!  I am definitely going to share some pictures and talk about our experiences and I'll even share a regionally inspired vegetarian dinner recipe (that I know you will love!). However the task of reviewing the pictures is daunting and I am still recovering from jet lag so in the meantime I want to share a project that I finished before we went on our great adventure that is perfect for summer.


This is decidedly a summer shawl and, as a result, not what I would call super versatile.  Principally because of the pastelly speckled yarn color that I chose.  It is, however, the perfect accessory for a summer garden tea party! If you like that kind of thing. And I do.  I should explain that I have a very loose definition of a garden tea party. For me a garden tea party simply requires a spot in your garden where one can sit and enjoy a large pot of tea and a scrumptious treat.  It's an appreciation that I acquired growing up in a household where every afternoon my mother served an English tea.  For those of you not as familiar with this quintessential English tradition and might need some help I have shared below a simple carrot cake recipe that would make an ideal treat and for tips on brewing a proper cup of tea I refer you to my post Put the Kettle On ~ It's Time for Tea.  Now all you require is a garden.


On a different note, it's hard to believe that it's already creeping toward mid-July.  Am I the only one who sees July 4th as the end of summer instead of the beginning?  I think it's the knitters' mindset to always be thinking a season ahead.  And there are a lot of hot long days ahead before fall arrives here in Southern California.  Yet from now until Thanksgiving all I'll want to knit are fall projects. Despite the fact that the window for wearing fall projects is like a month long because it won't cool down here until November.  Does anyone see anything wrong with this scenario?


But enough grousing about the long hot summer.  Instead I shall discuss this shawl in a little more detail.  It's hard to see in the photos but the dark blue edging decidedly rolls up.  This is a factor of its being knit in a very light weight and lofty yarn better suited to a smaller needle and also because I deliberately encouraged the rolling effect in the blocking process.  Why would I do that you wonder. Because I think a softer flouncy edge makes the shawl more appealing. Snicker.  Using the word "flounce" always makes me laugh because it reminds me of the time (many years ago) that an opposing lawyer told me that they had seen me earlier "flouncing" about the courthouse.  Apparently I still like to flounce about.  In any event I rarely block a shawl exactly as the designer suggests and for more tips on creative blocking I refer you to my Lunna Voe post.


Particulars:  Whippoorwill Shawl, designed by Carina Spencer; US 6 needles; Main color: 2 skeins GarnStories Merino Sox 465 yrds 75% merino 25% polymide (colorway KarmaKoma (at least that is what I think is written on the label)); contrasting color is Sundara Merino Fingering (dark blue).  I knit the large size and used only a small amount of my second skein in the main colorway and I definitely have enough left over for a pair of socks.  Although this is a pretty thin yarn at 465 yrds/ 100 grams.  But then again it does have 25% polymide so perhaps....

And a bit about my garden.  We live on top of an arid mountain so I don't have a lush garden.  But I have found a few plants that do well including the pink (and red) flowers seen in the top pictures. They are Dipadenia which are very hardy, climbing, and prolific bloomers and my favorite container plant.  The small birdhouse in the above photo is a fun and easy crafting project that I painted a few years ago (I purchased the unfinished birdhouse from Michael's) and is featured in this post.


Carrot Cake Recipe ~


I absolutely love carrot cake and you will love it too if you use this recipe!  It makes a light, not oily or overly sweet cake and I think it's the perfect treat to enjoy this summer with a cup of tea in your garden or to serve at a garden tea party. The recipe makes a single layer 8 inch cake and is an adaption of Jenny Keller's 3 layer carrot cake recipe.  I often bake just for myself and a 3 layer cake is simply more cake than I need.  I've also changed the frosting to a lemon butter cream instead of cream cheese and made a few other small changes to the cake ingredients to better suit my tastes. It is a winner no matter how you slice it and I'm sure the original recipe for a larger gathering would be a huge hit too.

Carrot Cake Recipe
~ yield ~ single layer 8 inch cake

Cake Ingredients:

4 oz. crushed pineapple
1 cup all purpose flour
1 tsp. baking powder
3/4 tsp. baking soda
1/2 tsp. salt
1 tsp. cinnamon
3/4 cup white sugar
1/4 cup light brown sugar
3/4 cup grape seed oil
2 eggs
1 cup grated raw carrot (peeled)
1/4 cup finely chopped pecans

Lemon Butter Cream Frosting Ingredients:

1 1/2 cups sifted confectionery sugar
1/2 cup sweet butter (room temperature)
1 tsp lemon extract or oil
1 Tbs or less whole milk
Pinch table salt

optional garnish with chopped pecans

Cake Steps:

1.  Preheat oven to 350 degrees Fahrenheit.  Prepare 8 inch x 3 inch cake pan (you can probably use an 8 x 2 inch pan in a pinch) by greasing well with butter. Line cake pan bottom with a cake liner or make a cake liner by placing cake pan on a sheet of parchment paper and tracing around base to make a template.  Cut out round template and use as your cake pan liner.

2.  Drain pineapple through sieve using back of a spoon and measure by weight (I used a generous 4 ozs of the pineapple meaning that I tossed in an extra tablespoon after measuring by weight 4 oz); grate carrots and chop pecans and set these ingredients to the side.

3.    In a large mixing bowl combine flour, baking powder, baking soda, salt, cinnamon, and sugars (white and brown).  Then add grape seed oil, and eggs.  Mix well using an electric mixer.

4.  Remove bowl from mixer and using a spoon stir in carrots, pineapple, and pecans and stir until well incorporated.

5.  Pour batter into prepared cake pan and bake for 40 minutes or until cake tester comes away clean.
Cool for 10 minutes in pan and then using a knife loosen the cake from the pan edges.  Turn cake out onto a wire rack to cool completely.  Frost when completely cool.

Adapted from Jenny Keller's ~ Best Carrot Cake Ever

Frosting Steps ~

Steps:

1.  Beat sweet butter until light and fluffy.

2.  Add sifted confectionery sugar, lemon extract, and a pinch of salt and beat until well combined.


3.  Add a small amount of milk (a teaspoon or two but no more than a tablespoon) and beat until desired consistency.

4.  Using a table knife frost cake after it has cooled to room temperature.  You will have enough frosting to frost the side as well as the top or just the top as I have with some left over.


6.  Garnish with chopped pecans, if desired.

Frosted cake keeps well at room temperature for 24 hours and then refrigerate.


Until next time be well, love well and take time to enjoy your garden this summer and maybe throw yourself a garden tea party!

Monday, December 19, 2016

Old World Gingerbread House and Snow Queen Scarf


Food is an important part of the holidays for me.  It's not like that for everyone.  I've actually met people who don't recall any special food from their childhood associated with the holidays other than that they had a turkey dinner.  My Steve is one of those people.  It's taken us a long time but after 30 years together we've come up with some wonderful food traditions for our holidays and without a doubt building a gingerbread house at Christmas is at the top of our list.

The origins of our tradition began with a trip to Chile many years ago and our stay at the Hyatt Hotel in Santiago where in lobby they had an actual gingerbread house (made of cookie dough and frosted) that you could walk inside and from which they sold individual gingerbread houses and cookie boxes. During our stay we consumed several of these delicious houses in an embarrassingly short period of time and have been left wanting more ever since.


And it remained just a wistful reminiscence until Steve suggested that we try making our own gingerbread house.  And so we did.  With a success that has left us giddy with delight and has amused us in the process more than I can say. There is something very fun about frosting and decorating a gingerbread house that will bring out the kid in everyone. Just you wait and see.

The most important part of making a gingerbread house is to use a wonderfully rich and flavorful gingerbread  because a large part of the fun is eating the house.  And when I thought about it I realized that I already had the perfect recipe that I had been using to make gingerbread men for many years. This recipe works beautifully to construct a gingerbread house and makes exactly the right quantity and it is so so so much better frosted and coated in candy!


A couple of housekeeping points before I get to the recipe.  It's best to plan on making your gingerbread house over two days, although it can be made in one.  I recommend that on the first day you make the gingerbread dough, let the dough chill, and bake the individual house pieces.  On the second day you can make the royal icing and decorate the house.  I like to ice the entire house as it will keep the gingerbread fresh and tastes wonderful.

Old World Gingerbread House Recipe ~

Gingerbread Dough:

1 C. shortening
1/2 tsp. salt
3 tsp. baking soda
2 tsp. ginger
2 tsp. cinnamon
1 tsp. ground cloves or allspice
(note: if you like a lot of spice you can increase the ginger and cinnamon by 1 tsp and and the cloves by 1/2 tsp.)
1 C. granular sugar
1 C. molasses
2 beaten eggs
1 tsp. instant coffee moistened in a little hot water (I use espresso powder)
5 C. All purpose flour

Royal Icing:

1 lb. sifted confectioners sugar
3 egg whites
1 Tbs fresh lemon juice or 1/2 tsp. cream of tartar

Suggested Decorations:

Candy Canes (You can use them whole or crush them for sprinkles)
gum drops
skittles (original soft style work best)
multi-colored sprinkles and sugars
Avoid unwrapped hard candies that will melt in the frosting

DAY 1 ~

Prepare the Dough Steps:
1. Cream first 6 ingredients;
2. Cream in sugar and molasses;
3. Add in beaten eggs and coffee (or espresso);
4. Add flour 1 cup at a time. After adding 3 cups stir in the last 2 cups by hand.
5. Allow dough to chill in the refrigerator several hours or until it's easy to handle.

Baking Steps:

1.  Preheat oven to 325 to 340 degrees (I generally preheat to 340 degrees) and prepare baking sheets by covering with parchment paper or silplat.
2.  While oven preheats download a gingerbread house template.  I highly recommend the free King Arthur Template. I divide the dough into half and I use a full half of the dough to make the 2 sides of the house.  I then divide the remaining dough into 4 pieces to create the roof (2 pieces) and the ends (2 pieces).  You want to divide the dough like this so that you use all your dough and that way you know your house is of the right thickness.  I typically have only enough scraps left over to make a small gingerbread man.  This style of gingerbread is meant to be thick and if it is too thin it will be dry and not as enjoyable to eat.

3.  Bake approx. 18-20 minutes (with my oven I generally preheat to 340 degrees and bake for 18 minutes) and cool on a wire rack.  You can then proceed to setting up and decorating your house or wrap the pieces well (air tight) if you plan on decorating the next day. If you intend to wait longer than a day to decorate I would freeze the house pieces until you are ready to keep them as fresh as possible.

DAY 2 ~

1.  Prepare a surface to construct your house.  I like to use a cutting board but any flat surface will work.  Lay out your gingerbread house pieces and find some soup cans that can be used to stabilize the house while it sets.  Before preparing your icing review the entire King Arthur Template for tips on how to set up your house.

2.  Preparing Royal Icing as follows*:  whip eggs whites until creamy and add either lemon juice or cream of tartar. Then add powdered sugar and whip until soft peaks form.  At this point I recommend you remove 3/4s of the icing and place into a sealed plastic bag (sealing the plastic bag will keep the icing soft) to use later for icing the house.  The remaining 1/4 amount of icing should be whipped until stiff peaks form (the longer you whip it the faster the icing will set and the harder it will dry). This firmer and fast setting icing is used to set up your house.  Scoop this icing into a small plastic bag and make a small cut in one corner which can be used to pipe out the icing as needed. Now follow the assembly steps in the King Arthur Template.  Once your house is assembled allow it to set 2 to 3 hours (or until firm) before icing and decorating.

3.  When your house is set use the icing you set aside earlier to ice all surfaces (icing all surfaces will keep the gingerbread fresh longer) and quickly decorate before the icing sets.

4.  Allow decorated house to set for a minimum of 8 to 12 hours (the longer setting time is needed because you are using a softer icing which is more enjoyable to eat that the firm icing used to set up the house).

*Alternative icing options:  1)  You can make two batches of icing.  The first batch (whipped until firm peaks) can be used to set up the house and the second batch (whipped to soft peaks) can be used to ice and decorate the house; 2)  If you are pressed for time you can simply use the firmer icing to both set up the house and decorate the house, but I don't recommend this as the firmer icing isn't as enjoyable to eat as the softer icing.

I hope this will become part of your family Christmas holiday traditions!

Adapted from Yankee Magazine recipe for Gingerbread Gentlemen (1993 issue).

Snow Queen Scarf


Before it gets lost in the shuffle I wanted to quickly share this scarf knit in a thick opulent combination of silk and wool, that makes me feel positively queenly when I wear it!  I purchased this yarn as a club offering several years ago from The Verdant Gryphon and the designer/dyer took her inspiration from The Snow Queen, one of Hans Christan Anderson's well known fairy tales. Although not nearly as well known as The Little Mermaid.  If you are not familiar with his work, all of his fairy tales are sad but they are beautifully told to reveals how through acts of kindness or selflessness anyone no matter how far they have fallen or how lowly they are in this world can achieve redemption. A thought provoking and interesting subject to explore no matter your age and is one reason his stories are worth telling and retelling through the ages.

While I chose not to use the design that came with this club offering I absolutely love the yarn and am also glad that I have the beautifully illustrated copy of The Snow Queen that came with it.  As always these clubs are risky as you have no idea what color, pattern and notions will be sent.  That being said I have rarely been disappointed in a yarn club.

Particulars:  Saroyan (free pattern) designed by Liz Abinante (Feministy.com); US 9 needles; 2 skeins The Verdant Gryphon, Codex (worsted 52% silk/ 48%wool 234 yds/113g per skein).  My only modification was to use 2 colors instead of a solid color.  To knit this using 2 colors simply twist the yarns intarsia style.  To maximize the amount of the light blue color I knit the entire edging in the contrasting color instead of simply the leaf.  Lightly blocked dimensions 66" x 10" (at widest point).

Wishing You a Merry Christmas ~


With the success of his calendar shot Simcha announced that he's available for kisses and autographs. For a price. Le sigh, despite our best efforts he still has a working dog mentality.

Until next time be well and love well and from all of us at The Knitting Blog by Mr. Puffy the Dog, we wish you a very Merry Christmas and Happy New Year!

Wednesday, April 20, 2016

Strawberry Coffee Cake Recipe and Celtic Inspired Shawl ~


Do you ever feel the need to slow the pace of your life down?  I'm feeling that way now and one way that I find helpful to regroup and refocus to a slower pace is to cultivate and enjoy the niceties of life. Such as enjoying a proper slice of cake with a cup of tea and my feet up and a good TV show on. Sadly I think that afternoon tea has largely disappeared.  But I grew up with an English mum and every afternoon of my childhood my Mother brewed a pot of tea, set out teacups and a plate of cookies and put the television on and so the tradition is firmly ingrained in me.  I enjoyed it then and I enjoy it now. There were many bits of advice my mother and father would have preferred that stuck but really what took was the importance of taking a break in your day.  It's much easier to cope with whatever life throws your way.

After taking a hiatus from watching my favorite TV shows during my teatime I'm back enjoying some of my favorite series again.  Some of the characters have become so familiar it's like visiting old friends.  Below I've shared a list of what I think are the best in British dramas and while these are largely older productions and "dated" to modern eyes the wonderful acting and stories more than compensates.  And to complete your viewing enjoyment I'm sharing a truly delicious coffee cake recipe.  The tea choice is up to you but I recommend either Yorkshire Gold (strong black) or Roobios Queen's Red Roses (caffeine free herbal).

I hope that you will find this combination as wonderful a respite from a hectic and upside down world as I do.  No allusions to current politics whatsoever.

Favorite British Drama TV Series* ~

The Darling Buds of May
The Pallisers
To Serve Them All my Days
All Creatures Great and Small
Poldark (original version)
Upstairs Downstairs
Horatio Hornblower
To the Manor Born
Outlander
Summer's Lease

Favorite Mystery/Crime TV Series ~

The Bridge (subtitles)
Foyle's War
Midsomer Murder

*All links are to Amazon for convenience which is not necessarily the best price.

Without further ado ~ the accompanying cake recipe.


Strawberry Coffee Cake Recipe ~


1 1/4 C plus 1/3 C flour, divided (the 1/3 C flour is used later for the topping)
3/4 C. granulated sugar
2 tsp. baking powder
1/2 tsp. salt
6 Tbs plus 2 Tbs unsalted butter, softened and divided (the 2 Tbs butter is used later for the topping)
1 egg, slightly beaten
1/4 C. milk
1/2 Tsp almond extract
1 1/2 cups quartered organic strawberries
4 TBS organic brown sugar
1/2 Tsp cinnamon

Glaze:
1 Tbs unsalted butter, melted
1/2 C powdered sugar (sifted) 
3 Tsp milk (approx.)
1/2 Tsp almond extract

Steps:

1.  Preheat oven to 350 ~ and butter and flour an 8" springform pan.     

2.  Combine 1 1/4 C flour, granulated sugar, baking powder, salt, and 6 TBS butter and combine with a pastry cutter until consistency becomes similar to corn meal;
3.  In a separate bowl combine egg, milk, and almond flavoring.  Add to dry ingredients and quickly mix until just combined;  Pour into prepared cake pan.
4.  Prepare strawberries by washing, drying and dicing.  Spread evenly over surface of cake mix (they will sink to the bottom during the baking process);
5.  Combine remaining 2 TBS butter, brown sugar, remaining 1/3 C flour, and cinnamon with pastry cutter - and sprinkle mixture over plums.
6.  Bake 45 to 60 minutes or until cake tester comes out clean.  Remove from oven and let stand 10 minutes before removing from pan.  Pour glaze over cake (glaze is made by combining butter, powdered sugar, milk and almond flavoring). 
7.  Serve warm or at room temperature with a scoop of vanilla ice cream!

Recipe adapted from a Plum Coffee Cake recipe by South Cliff Inn.


 Celtic Design Inspired Shawl ~

I love this beautiful Celtic inspired shawl.  I finished it last Spring but for various reasons it never fit into a blog post.  I actually knit more projects than I have time to blog (I do have work commitments lol) and this shawl is a gem that missed it chance to shine.  It may not be apparent from the picture but It's a good sized shawl (66" x 24") but as it's knit in a light fingerling yarn it's not too heavy and makes a perfect transitional season piece.  I love the Celtic cabling along the edging which is the main reason that I chose to knit it.  Be warned however because I found that cabling a pain to knit.  But as I look at it now it was worth all the effort.


Particulars:  Ishneich designed by Lucy Hague; US 6 needles; 2 skeins Sundara Yarn Petite Sock Yarn 490 yds per skein (colorways Travels to Japan #18 / Travels to Japan #8). N.B. I only had 14g of the light color leftover and 48g of the dark, which means I used substantially more yarn than the pattern indicates despite using the recommended needle size, i.e. based on my rough math calculation I used 431 yards of the light colored yarn instead of 370 yards as indicated in the pattern so you might want to have a little extra yarn on hand to be on the safe side.


Until next time be well and love well.  For those who observe Passover (as I do) please accept my apologies for the timing of this recipe!  You'll just have to wait a week to give this recipe a try and in the meantime simply enjoy strawberries naturally ~ 


Saturday, November 14, 2015

Pumpkin Bread with Walnut Topping

Paris Tragedy ~

I wrote this post prior to learning of the tragedy in Paris and wanted to briefly preface the post by saying how very saddened I am for the people of France and everywhere in the world these horrific acts of terrorism have occurred.  I wish we lived in a world where we asked ourselves whether our acts added to love, intimacy, beauty or creativity and if they didn't we found another way to express ourselves.  But until then we must all unite and condemn acts by individuals that target the innocent and unsuspecting as there is no ideology or religious rationalization that makes this type of cowardly act justifiable.  God be with those who are suffering and grieving.

Pumpkin Bread with Walnut Topping ~

One of the nicest seasonal treats in the autumn is rich fragrant pumpkin bread.  I love the redolent scent of spices filling the house as it bakes to perfection.  And it's also a healthy snack.  Aside from the sugar of course.  But as snacks go I think you can do worse that pumpkin bread!  In any event, this is a favorite recipe of mine and I wanted to share it before Thanksgiving so you would have a chance to try it this season.  Because soon, very soon, it will be time to turn your thoughts toward decorating for Christmas and baking those Christmas cakes, gingerbread houses, mince pies and other Christmas favorites.    


Pumpkin Bread with Walnut Topping
yield ~ 1 loaf ~

Ingredients:

1 1/2 cups sugar
1/2 cup walnut oil (or canola oil or other light flavored oil)
1 whole egg + 1 yoke
8 ounces pumpkin puree (roughly a generous 3/4 cups)
1 1/2 cups all purpose flour
1/2 tsp baking soda
1/4 tsp baking powder
1/4 tsp salt
1/2 tsp ground cloves
1/2 tsp ground cinnamon
1/2 tsp ground nutmeg
Topping: Between 1/4 cup and 1/2 cup finely chopped raw walnuts

Steps:

1.  Preheat oven to 350 degrees and prepare loaf pan (butter and flour).
2.  Beat together wet ingredients (sugar, oil, egg, pumpkin puree).  Remove bowl from mixer.
3.  Combine dry ingredients in separate bowl (flour, baking soda, baking powder, salt, cloves, cinnamon, nutmeg).  Using a wooden spoon stir the dry ingredients into wet in two additions.
4.  Pour batter into loaf pan and generously cover top with chopped walnuts. Bake at 350 degrees for 1 hour and 10 minutes or until wooden tester comes away clean.  I usually start testing after 1 hour and 5 minutes.
5.  Allow to cool in pan 10 minutes.  Use a knife to loosen bread and turn out onto wire rack to finish cooling.

Recipe adapted from Epicurious


Of course you don't have to add walnuts on top if you don't wish, it's just as delicious without!


Until next time, be well, love well and be sure to bake something pumpkin-y before the season disappears for another year.