Sunday, December 20, 2009

Christmas Capelet


This is my Christmas Capelet and it raises in my mind the specter of dress style for today's couples. Do you have a mate who's idea of getting dressed up is to wear dress shoes with jeans? I do. But I've take the view that one must dress to please one's self. Steve, bless his heart, is just not happy getting dressed up. But, what he lacks in dress style he more than recommences with wit and good company!

I'm calling this my Christmas Capelet because I knit it to wear this Christmas. I wanted something special to wear on Christmas day but not one of those gaudy Christmas sweaters that one finds in the stores. It is unfortunate that Christmas has become so commercialized because the real beauty of the holiday can get lost in all the trappings. About ten years ago we spent our Christmas holiday in South America (Chile). I was struck by the absence of a jolly red Santa on every corner. Instead there were nativity scenes and decorations made from greenery and candles. I think I like it best if there is a balance. Decorations are nice but the spirit and essence of the holiday shouldn't be lost.

I remember we spent Christmas Eve in Puerto Montt, Chile and it was cold and drizzling out. Despite the weather the streets were filled with families all dressed up milling about and the air was filled with excitement and happiness. I asked our hotel if there was an event taking place. But no. Apparently it simply is the tradition in that town to dress up and walk as a family downtown Christmas Eve. I loved being there and feeling a part of their celebration and enjoying the quiet beauty of the nativity scene, the focus of the town's decorations. It felt very special.


It has always been our tradition to take a family walk on Christmas Day. Once the turkey is in the oven we all bundle up and go for a walk on the beach. It's a nice time of togetherness. Coming home we are greeted by the smell of roasting turkey and the beautifully decorated tree. Below is a picture of me and sister walking on the beach on a Christmas morning that has long since past. Yet I still return home and walk on the beach with my parents every year.


Knitting for me is a means of self expression and defining who I am and that's really why I chose to knit this capelet for Christmas.


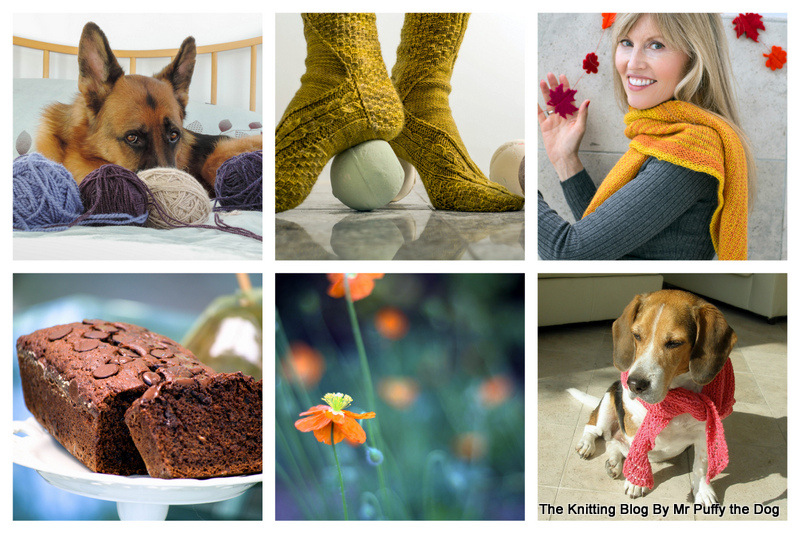
Particulars: Antonia Shawlette/Capelet a pattern from the Family Trunk Project a collaborative effort explained here. I used Tosh Sock yarn (malachite colorway) by Madelinetosh, US 3 circular needles. My only modification was to add decorative leaf ties as I thought a caplet ought to have a tie closure. You could easily use a satin ribbon instead.


How to Knit Leaf Ties

To emphasize the "caplet" nature of this shawl I added leaf ties reminiscent of what might adorn a cloak. My leaf ties are modeled after the leaf ties on the Cropped Cardigan a free pattern published in Knitty an on-line knitting magazine. I simply adjusted the pattern to a fingering weight yarn and to create a more rounded leaf shape.


Using a fingering weight yarn and using US 2 needles:

Cast on 2 stitches. Knit a 2 stitch i-cord to desired length. My i-cords for this shawl are 15" and 16" respectively. When your i-cord is desired length, form the leaf as follows:

Using a seed stitch pattern throughout:
Row 1: K1, M1, K1 (3 stitches)
Row 2: Increase (knit into front and back) 1 stitch at the beginning and end of the row (5 stitches)
Row 3: Repeat Row 2 (7 stitches)
Row 4: work even in seed stitch
Row 5: K2, M1, K1, M1 K2 (7 stitches)
Row 6 - 9: work even in seed stitch
Row 10: Decrease 1 stitch at beginning of the row using ssk decrease. Continue decreasing (via ssk) the first stitch of each row until 1 stitch remains. Bind off last stitch. Attached your I-cord by twisting into an "S" shape and sew to shawl using a button on the back to anchor the tie as shown in the picture below. The button will help provide some stability.


However, I caution that because shawls are knit into a fine/thin fabric, the tie is largely decorative and for light wear only.

Away for Christmas

We will be away for Christmas and the week following so no Christmas tree for us this year. But still spots of holiday cheer are to be found here and there. This year I've enjoyed making yarn ornaments fashioned after pine cones inspired by Ressurection Fern who has provided a link to all of her tutorials for this and other handmade crafts here.

These yarn ornaments add a festive touch to most everything, or any outing, as Mr Puffy can attest! I simply used odds and ends from partially used skeins of yarn and added a festive ribbon from my wrapping supplies. The yarn ball pictured above is made with Noro's Silk Garden and the one Mr Puffy is wearing in made with Rowan's Kid Classic. These are basically updated pom poms which are a quick and easy yarn project that both kids and adults will enjoy making!


Mr Puffy, Steve, and I wish everyone a safe, healthy, and happy Christmas and hope that the New Year will bring good tidings to you and your family. We will be taking a brief break from all things technical here on Mr Puffy's Knitting blog for the next few weeks but shall look forward to seeing you once again in 2010!

Thursday, December 10, 2009

Quick Knits and Gift Ideas!

Cowls are not a new fashion accessory of course; they have been around since the middle ages. But this year they are back in a big way and they are hot hot HOT! Even the Wall Street Journal has taken notice, opining Can the Snood Save Christmas? Snood, cowl, or infinity scarf, it's all basically a circular scarf worn about the neck and head.

They are a quick knit, but I haven't knit a cowl for years. I think it goes back to that first experience I had knitting a cowl. Imagine sprinkling itch powder all over a scarf and then wrapping it around your neck several times. The instant I put it on I knew I had a problem. Funny, though, because the yarn didn't feel itchy or scratchy while I was knitting with it. I totally understand now why someone with a martyr complex is said to wear a hair shirt.

But I'm no martyr and I wore that cowl for all of a New York minute. I had knit it in pure alpaca which is waaaay to itchy for a garment worn about the neck. Take it from me, and I'm pretty tolerant to yarn itch factor.

But cowls are once again seen everywhere. Why shouldn't I knit one too? It's quick and not a difficult knit. And yet. Any knit can have it's complications.....


My second cowl also went down in flames. I wouldn't say the yarn was too itchy. It was more that the yarn was too stiff. But enough already, for this third and final cowl I did my homework. I went into a LYS and looked at the cowls in the shop. Those LYS owners know what they are doing! This cowl is designed by Cardigans Knit Shop and is a designer knockoff knit in a soft, stretchy, non-itchy yarn that comes in great colors. Finally a cowl to love!

Particulars: Infinity scarf/cowl named for its construction. It's knit end to end and joined by grafting the live stitches together so there is no beginning or end to the knitting; hence its name infinity scarf. For my provisional cast-on I used Judy Becker's Magic Cast on demonstrated here I then threaded a piece of yarn through the live stitches until needed. It's a free pattern (I'm in the process of writing it up); 2 skeins Debbie Bliss Cashmerino DK; US 10 needles.

There are some beautiful and free on-line cowl patterns. Just be sure to chose your yarn with care! Two of my favorites are the Cable Cowl by Pickles and the Winding River Cowl by Interweave Knits (Winter 2009) [ravelry link].

Gift Ideas for Knitters:

Before I sign off, I've come across some fun gifts ideas that I want to pass along:

Signature Scarf kit:

My friend Murielle of Murielle Knitwear is finally selling kits of her very popular Signature Scarf. She is also making her Signature Scarf pattern available for free on her website Murielle knitwear/free patterns link. All of her kits are one of a kind, but will look generally like the scarfs shown below. These kits are quick to knit, fun to wear, and would make a great gift!


Magic Yarn Ball

I'm participating in a magic yarn ball swap hosted by Theresa of TDoesWool. The idea is simple. Knitters know what other knitters like in a way unfathomable to muggles/non-knitters. I think that's one reason swaps on-line between knitters are so popular. The basic idea of a magic yarn ball is to buy a nice ball of yarn and then roll it up including small items that will be revealed as the yarn is knit. Theresa has given some ideas for items to include on her Yarn Ball blog. This swap is not due until January 31, 2010 so hurry over and you still might have time to join! For pictures of yarn balls and inspiration visit the Flickr Magic Yarn Ball Group. Even if you are not participating in a swap, this would make a fun gift!

Tapestry Needle Case


A tapestry needle case is the epitome of a great gift, i.e. something you wouldn't think of buying for yourself, but are delighted to receive. Knitters use large tapestry needles for finishing work and I have several of these needles that used to rattle about in my craft box, pricking my fingertips as I poked about looking for things. Now they are attractively and safely ensconced in a beautiful needle case and I couldn't be more thrilled. This gift came from Chan of ChanKnits; she has some wonderful vendor friends who donate lovely gifts that she happily passes along on her blog! This needle case is handcrafted using the beautiful and exotic Padauk Wood by ROM Woodworking. If you are on a budget, Clover sells a similar Chibi needle case which comes with a selection of tapestry needles. This is a great stocking stuffer item!

Until next time, be well, love well, bundle up and stay safe as we are all out on the roads more over the holiday season!

Monday, November 30, 2009

A Traditional Christmas Cake Recipe


In today's busy world I think we have had to sacrificed tradition in favor of ready made convenience. It's so simple when the grocery store has everything you need for a holiday on a ready made platter. But that feels so empty to me and many others. Instead many of us at this time of year will pull out favorite family recipes that we make each year that are special to our family and connect us to generations past.

It's still different than times gone by and the Christmases that my mother and father remember from their childhood. My mother is 83 now, and was a child in England prior to WWII when times were very different. Her family had a separate room that was shut off from the children during the weeks preceding Christmas called Bluebeard's Room. This room was not opened up to the children until Christmas morning when for the first time the children would see the Christmas tree all lit up with presents spread below. The excitement of anticipation was hard to bear. During the night Santa would have delivered a Christmas stocking on her pillow filled with candy, small treasures and a tangerine in the toe. She always received one very special present from Santa. One year she remembers her special gift was a beautiful doll despite her mother having said she was too old for dolls that year and a twinkle in her father's eyes.

One way that I feel connected to my English heritage is though traditional English fare around the holidays. My mother always made a Christmas Cake that was decorated with tiny plastic reindeer pulling Santa's sleigh. I'm not going to share her recipe, though, as it makes too large a cake (it uses a dozen eggs) and, frankly, was sometimes a little undercooked.


Instead I'll share the recipe I used this year. The pictures in this post are my cake from last year (except for the one immediately above). I did this so that you see could see what the cake looks like when decorated, because I will not decorate my cake this year until the night before Christmas. The recipe I used last year came from Denise of The Knitting Den who was kind enough to share her friend's recipe. It made a wonderful cake, but was a little vague on instructions and ingredients so this year I searched and found a very similar recipe here, that I've slightly modified and/or clarified to incorporate aspects of Denise's recipe.

Recipe for A Traditional English Christmas Cake
One 8 inch (20 cm) round or 7 inch (18 cm) square cake pan. Pan should be 3 inches deep. If you don't have a cake pan in this size, the link above to the original recipe gives the recipe for a variety of different sized pans.

Preheat Oven: 300 F (150 C) Approximate cooking time 2.5 hours

Ingredients (ALL ingredients are BY WEIGHT):
12 oz. currants (or I prefer 10 oz. currants and 2 oz. dried figs (or dried dates))
5 oz. sultanas (i.e. golden raisins)
5 oz. dark raisins
2 oz. mixed chopped peel (i.e. lemon and orange)
3 oz. glazed cherries (washed and cut in half)
6 oz. unsalted butter
6 oz. dark brown soft sugar (I like to use organic brown sugar with a rich molassas flavor)
3 eggs
1 tablespoon molasses or black treacle
7 oz. all Purpose (i.e. plain) flour
1 oz. almond flour or Ground almonds
1 tsp. All Spice
1/4 tsp. nutmeg (optional)

Additional Ingredients:
Brandy (I buy a very large bottle and it's enough for two cakes)
Apricot Jam
Marzipan (I use 2 of the 7 oz. tubes)

Royal Icing Ingredients:
powered sugar 1 lb. (sifted)
3 egg whites
1 tablespoon lemon juice

Ribbon and Ornaments for decorating
Wax Paper (to line cake pan)

Steps:

1. Begin by soaking dried fruit, mixed peel and cherries overnight in brandy. I use enough to cover the fruit mixture entirely plus an extra 1/2 inch so that all the fruit is soaked well because, if I haven't mentioned it yet, I enjoy a strong brandy flavor to my cake. Almost all of it will be absorbed by morning. Drain off excess prior to using.

2. Prepare cake pan. Trace a liner in wax paper by using your cake pan as a template. Cut out forms to fit bottom of pan and strips to line sides. Use butter to moisten pan which will hold the wax paper in place. Set baking pan aside while you prepare your cake mix.

3. Soften butter prior to using. Measure out all ingredients ahead and have ready to combine as needed. Eggs should be at room temperature.

4. Beat butter, sugar and molasses until light and fluffy. Add eggs one at a time, beating well after each addition. A small amount of your flour may be added at this stage to prevent curdling.

5. Remove mixture from mixer. Add all purpose flour and ground almonds (alternately) and stir by hand with a wooden spoon. When mixture is well combined stir in dried fruit (drained).

6. Spoon cake mix into prepared cake pan and bake approximately 2 hours 45 minutes. Because I have an oven that runs hot, I only needed to bake mine for 2 hours and 30 minutes. The cake is done when tester comes away clean.

7. Cool your cake completely in cake pan sitting on a wire rack or your stove top.  When cake is completely cool poke holes in the top and drizzle with a small amount of brandy.  Then wrap cake in cheesecloth and store in an airtight cake tin.

8.  Feeding your cake.  You will need to "feed" your cake brandy periodically during the maturing phase. It should be clear by now that I like a strong brandy flavor to my cake.  Remove the cheesecloth and drizzle with approx. 1 tablespoon brandy and reapply the cheesecloth.  Feed your cake brandy once a week by adding approx. 1 tablespoon brandy until ready to ice and decorate.  If, however, you don't like a strong brandy flavor (and bear in mind the cake already has lots of brandy in the fruit) you can periodically add a couple of apple slices to the cake tin to keep the cake fresh, but remove them after a day so that they don't go moldy.  I actually have begun doing this the past few years instead of adding so much brandy and actually like it better.

9. Allow cake to mature for several weeks. Decorate the day ahead of serving.

DECORATING YOUR CAKE:

Begin by applying a thin layer of apricot jam to the entire surface of the cake.  Then unwrap your marzipan and kneed until soft and pliable (coat your hands with powdered sugar to prevent sticking) and roll out your marzipan as you would a pie crust.  Make sure it is large enough to cover the top and sides.  Press the marzipan into the jam which should help it to stick and smooth with your hands. Now you are ready to make the icing.  N.B. Do not prepare your icing until you are ready to decorate your cake (i.e. gather any ribbon and/or ornaments that you need) as the icing will quickly dry into a hard surface.

PREPARE ROYAL ICING:

Royal Icing:

Whip egg whites until creamy. Add powdered sugar and lemon juice and whip until soft peaks form. Quickly ice cake and immediately decorate before the icing sets (which happens very quickly).

ALL FINISHED:

Step back and admire your creation! Remember, if all fails and your cake is not "all that" then just smoother it in more brandy, light it on fire, and serve with a side of custard and call it a Christmas Pudding! If it is a success (and I'm sure it will be) then enjoy it on cold afternoons with a cup of tea or a glass of sherry.


Of course, wearing an appropriately saucy apron while doing your holiday baking does help put one in the proper mood! As will listening to cheery holiday music. My favorite holiday CD is Martina McBride's White Christmas which was recommended by the lovely Renee of Renee Knits too last year. Thank you Renee, I love listening to this CD!

I know that not everyone enjoys Christmas Cake, but there is no need to stick your tongue out and go ewww. Thank you Puff, that's quite enough. If you are like Mr Puffy who does not enjoy the flavors of brandy and dried fruits then it is probably not for you either. Instead, you might prefer these holiday cookie recipes shared in years past: Old Fashioned Gingerbread Men; Walnut Cookies; and Almond Crescents.

Until next time, be well, love well, and happy holiday baking! Up next are some quick knits and other last minute Christmas gift ideas!

*********************************************************************************

I've added below a recent picture (from 2019) of a cake that I made for my mother's 93'rd birthday.   I asked her a few years ago what kind of cake she would like for her birthday and she wanted a Christmas Cake and so that is what I've made her every year since.  I wanted to show that this cake is versatile and can be decorated in a different style and enjoyed year round!  


The small flowers are handmade in royal icing that I purchase from Etsy.

Wednesday, November 18, 2009

Twilight Inspired Mittens

Warm and stylish, these are my Twilight inspired mittens!


I know some of you are perplexed why I knit so many warm items when, after all, I live in sunny Southern California. But it does get cold here! Freezing cold (not literally of course) but pretty darn cold. And this Fall it has been particularly cool..... which is why I am so delighted to have my Twilight mittens!


Has anyone else had an unusually cool Fall? Now don't laugh at this. As I get ready for bed, I sometimes listen to Coast to Coast, a radio program that airs during the late hours. It discusses UFO sightings, conspiracy theories, ghost stories, and new scientific discoveries. It is all utter twaddle, of course. And yet. Around about midnight, when I'm very sleepy, it all starts to make sense. For example, could the diminishing solar flares be having a cooling impact on earth's temperature? Maybe. It is cooler this Fall, at least here in Southern California. Not that I don't find pollution plenty worrisome too, because I do. I'm just wondering if maybe there aren't additional and perhaps stronger factors having an impact on earth's temperature.


Whatever the reason, it is a cooler this Fall and I'm happy to have these cozy mittens! The pattern is Bella's Mittens and this pattern was inspired by the mittens worn by Bella in the movie Twilight. I have to confess, I have not read the book or seen the movie. But I am a huge fan of Subliminal Rabbit, the clever knitter who designed these mittens, so I had to have a pair. Plus, some of my favorite on-line knitters have knit these and it's fun when everyone is wearing the same hand knits! Check out Bella's Mittens knit by: The Yarniad; At Home Mommy Knits; SweetP Knits; and a whole collection at Bella's Mittens Flickr Group. For those of you who haven't the time to knit yourself a pair you can buy Bella's Mittens directly from Ruth Cross who sells the original Bella's Mittens (as seen in the movie) as well as a variety of other hand knits.


Particulars: Bella's Mittens ~ free pattern ~ courtesy of Subliminal Rabbit! This is a very easy to follow pattern and I can't say enough good things about it. It's fun to knit, well constructed, and in a snap you will have mittens sure to delight your Twilight fans! My only modification was to reduce the needle size from US 8 to US7 as I prefer mittens knit at a tight gauge. I also knit these on doubled pointed needles rather than magic loop as I tend to achieve a tighter knit on double pointed needles. This pattern is currently featured in a UK craft magazine and has spawned many accessory knits (hats and scarfs) which you can read more about here.


The yarn I used was a gift from DizzyDragonflies.etsy who is better known as Vicky at Knitting Dragonflies. I stranded the yarn with GGH's Soft-Kid to achieve gauge (soft-kid is a yarn similar to Rowan's Kidsilk Haze). Vicky's yarn is lovely and soft as well as beautiful, as she has a talent for color work. She calls this colorway Fall Foliage and she gave it to Mr Puffy and me to remind us of Fall in Indiana (which was our home for ten years). It is a very special gift and I'll treasure these mittens always. Thank you Vicki, and watch your mailbox as a little thank you is heading your way.


Mr Puffy Update:
Last week Mr Puffy and I had a nice restorative visit with my parents in Santa Barbara. We took long walks, relaxed in front of the fire, and drank endless cups of tea! Mr Puffy loves it when we visit because he is spoiled and he gets to wander freely in my mother's garden which is enclosed and safe to do so, unlike at home where he is always supervised and on a leash when outside. At times I don't think he wants to leave! I can't blame him, I'm never ready to leave either.


Have a wonderful Thanksgiving everyone and, until next time, be well, love well, and happy knitting! P.S. Next time I'm going to share a recipe for a traditional English Christmas Fruitcake to kick off the Christmas season and I'm really looking forward to seeing all of the holiday preparations taking place in blog land!

Saturday, November 7, 2009

My Colonial Scarf

I love the Colonial period of United State's history. It was a time of great hardship but also a time of extraordinary events for our country. I also related to the puritan philosophy of that time and the simplicity of ideas and values. Or so it seems until you look closely. I suppose every generation faces their own troubles and political difficulties.


In any event, this simple scarf reminds me of Colonial America and I couldn't resist knitting it in time for Thanksgiving.


My interest in the colonial period was recently reinvigorated when I watched a couple of videos about that period. If you are interested in this period, you might also enjoy watching them. One was John Adams (an HBO miniseries) and other was a movie The Crossing about George Washington's surprise attack over the icy Delaware with the future of our country in the balance. Both were very strong men who knew a thing or two about facing opposition and difficult odds.

A blogging friend, Tracy of Pink Purl recently featured this post reviewing the book My Dearest Friend, Abigail and John Adams, which is a closer view of this extraordinary couple.

Particulars: Cinnamon Grace (free scarf pattern courtesy of Knitworks by Katie Harris); 3.5 skeins Blue Sky Alpacas - Melange; US 3 needles - circular 40 inch; modifications: none. The pattern states this should be 72 inches long. Mine is a 46 inch crescent shape. I washed but did not stretch or block this as I think some of the flounce might be lost if you do that. Or, perhaps mine turned out so much shorter than 72 inches cuz I was doing something wrong. Who knows. I am happy with the length, in any event.


Sorry for this short and rather disjunct post. I'm tired and feel as though I have worked a thousand hours these past few weeks. Wanted you to see my home office (in the upper corner of the above picture) where I unravel complex accounting frauds. I'm afraid I'm not very tidy, but I know where everything is. I'm currently in the middle of a large case that is in full swing with pretrial filings and discovery work.

But, since the holidays are coming whether we are ready or not, here's a nice recipe (picture from last year) that is a favorite of mine.

Holiday Salad Recipe ~ Mixed Greens with Oranges, Cranberries and Pecans

Keeping with a colonial theme, this is a rustic but tasty salad that compliments the flavors of the Fall harvest. It's a great dish to take along when meeting knitting friends for lunch or a large gathering of family. I mix the dressing ahead of time along with the pecans and then just pour it over the green salad just before serving. I hope that you will enjoy this salad as much as I do!


Ingredients:

6 Servings:

1 cup plus 3 Tablespoons orange juice
6 Tablespoons dried cranberries
3 1/2 Tablespoons Olive Oil
2 Tablespoons white wine vinegar
1 Tablespoon grated orange peel
6 cups mixed baby greens
3 oranges peeled and white pith removed, segmented
3/4 cup pecans, toasted

Directions:

1. Bring 1 cup orange juice to simmer in heavy small saucepan. Remove from heat. Mix in dried cranberries. Let stand until softened, about 30 minutes. Drain well and discard soaking juice.

2. Toast pecans for approximately 10 minutes in a low oven. Set aside to cool.

2. Whisk oil, vinegar, orange peal and remaining 3 Tablespoons orange juice in small bowl to blend. Mix in cranberries. Season dressing to taste with salt and pepper (can be prepared 1 day ahead). Cover and refrigerate. Bring to room temperature before serving.

3. Place greens in large bowl. Toss with 2/3 of dressing. Add the orange and pecans. Serve remaining dressing on the side.

Mr Puffy Update


Busy yes. But not too busy to buy Mr Puffy a pumpkin. He continues to do well and be cheerful, bless his little heart. Until next time, be well love well and celebrate togetherness this holiday season!

Friday, October 16, 2009

High Time to Learn Fair Isle!


I have procrastinated for far too long on learning to knit fair isle. The main reason being that this style of knitting appeared both complicated and the patterns seem largely outdated. Enter Alice Starmore's Hat Trick a trio of hat designs inspired from flowers in her garden. I fell in love with these hats the minute I saw them and knew that the time had finally arrived to learn to knit fair isle!

The beauty of learning a new technique on a hat is, well, because hats are small! That means sizing and shaping issues are minimal and the time commitment to finish is short. Which boils down to less risk of investing in an expensive project that you never finish because you find yourself bogged down with troubling sizing issues or complicated pattern instructions which invariably lead to a project that languishes for want of love and attention.


Even so, I didn't embark upon this venture lightly, or without advance preparation. I've had the book The Art of Fair Isle Knitting, History, Technique, Color & Patterns by Ann Feitelson for years, which I pulled out and reread in earnest. The best piece of advice I gleaned from this book was that if I did nothing else I needed to master carrying two colors of yarn simultaneously if I was ever going to enjoy knitting fair isle. While it's possible to knit with just one color yarn at a time and then drop and switch colors as needed, this will never allow you to develop a rhythm or uniform tension.

Several methods of carrying the yarn are described in the book, along with the strong advice to try them all before settling on one. I followed that advice and found that carrying both yarn strands in my right hand afforded me the most uniform tension. This also happens to be the most common Shetland method where, after all, they developed this style of knitting and should know a thing or two about how best to go about it.


Something to remember about fair isle knitting is that you only have two colors of yarn in any single row. That means you only carry two strands of yarn at any one time, which, with a little practice isn't all that hard to do. I know it looks complicated but the richness and complexity of the designs is achieved through the genius of mixing both graduating and contrasting colors all the while using just two colors at a time.

I'm running a little long in this post, but when I'm knitting my next hat from this kit (they are all different in both pattern and shape) I'll take pictures showing my hand position to give you an idea of what yarn position worked for me. Unfortunately I did not find any great videos out there to make this any clearer than the pictures I found in Ann Feitelson's book, or I would have linked to them for you.


In summary, I think we can all agree that this is a beautiful design. But it is supposedly inspired by the Hebe flower (picture of a Hebe flower is shown below). Do you see it? I don't know. It's a tough call. I think if you consider how well I captured the plant life in my brooch (immediately prior post) this is a real stretch. But, who am I to say. Alice Starmore is a legend.


Particulars: Hat Trick (Hebe) by Alice Starmore; available as a kit from Virtual Yarns; US 2 double pointed needles; my only modification was not to increase to US 3 needles after knitting the brim sticking with the US 2 needles. I did this because I thought some of the pictures of the hat looked on the large size. As it is, it's a snug fit on my 21" head but I suspect with a few wearings it will relax some.


Mr Puffy Update

I explained to Mr Puffy that now he's doing so well there's been enough lolling about. It was time for him to be productive and useful again. I told him "all your fans have missed seeing you model." When he heard this, he was then only too happy to oblige.


Something to Try this Fall: Homemade Granola

I love homemade granola and this time of year it's particularly nice to have some on hand. My current favorite is Coconut and Macadamia Granola recipe courtesy of Andon-Rein Inn. I generally find that Bed and Breakfast recipes are tried and true and this is no exception.

The only modification (really a substitution) is that I use plain whole wheat flour instead of "pastry" whole wheat flour. I also skip the coconut extract, simply because I don't have any on hand and never seem to remember to buy any. I'm pretty generous with the quantity of unsweetened coconut, which I love. It's hard to find unsweetened coconut flakes but you might find it in the organic food section.

There are a number of ways to enjoy granola. It's nice sprinkled over a dish of fresh fruit. It is also great mixed in with a box cereal (which is what my parents like to do) or you can crush it into small bits and mix it with cream cheese for a fancy bagel spread. Mostly, I just snack on it by the handful.

For a quick and easy alternative recipe, here's Mr Puffy's own recipe for homemade granola:

1/4 cup maple syrup
1/4 cup canola oil
1/2 tsp. vanilla extract (optional)
3 cups slow cooking oats
Dried cranberries - roughly 1/2 cup (or to taste)
Chopped fresh pecans or almonds - roughly 2/3 cup (or to taste)

1. Preheat oven to 300 degrees.
2. Mix together maple syrup, canola oil and vanilla extract. Pour wet mix over oats and stir until oats are well covered.
3. Spread mixture evenly in a shallow roasting pan. Roast 15 minutes.
4. Remove mixture from oven and add chopped nuts. Continue roasting for another 30 minutes - turning once more after 15 minutes. Watch oats and nuts closely and reduce oven temperature if they are cooking too quickly. They should be a nice golden color - not brown - which means they have over cooked. All ovens are different and some are hotter than others.
5. Total cooking time is roughly 45 minutes. Final step is to add dried cranberries after fully cooked and mixture is removed from oven. Cool completely in pan and store in air-tight container.

Until next time, be well, love well, and try making your own homemade granola ~ I think you'll enjoy it!

Friday, October 2, 2009

Crafting with Wool Felt


I'm primarily a Knitter, but I also enjoying mixing things up and, lately, I have been experimenting with embroidery and wool felt. I'm pleased with the result and so am passing along to you this cute project idea, which is easy and satisfying no matter how meager or vast is your experience with embroidery.

Pictured above is a small brooch that I embroidered on wool felt. The idea (and "know how") to make this brooch came from Tiny Happy who has a talent for beautiful free style embroidery, mostly inspired from nature. She simply plucks and pillages small bits of foliage from her garden which then becomes the model for her designs.

Following her lead, I set about finding my own inspiration to make a brooch.... which led to Steve wanting to know why I was taking pictures of weeds. I patiently explained that these were not weeds, they were my inspiration!

I'm sure if you look at the picture below, and then compare it to the photo above of my brooch, you will see with what talent I captured these weeds, ahem, flowers. You don't have to say it. I know you can. Because this was my first brooch, I went with a simple design (as recommended by Tiny Happy) and used a combination of running stitch and french knot. I've enjoyed wearing it several times and have since then made several more brooches of different designs and colors that I like equally well!


You'll naturally want one for yourself, but I think they also make cute gifts. With the fast approaching holiday season it's always a good idea to have a few small gifts items on hand for teachers, neighbors or hostesses or for simply whenever the mood strikes you to make someone smile! If sewing isn't your thing, the washcloth shown above takes just minutes to knit and, along with a nice bar of soap, is another quick gift idea.

The handmade bar of soap pictured is from Lizzy Lane Farm . I enjoy this blog which provides a glimpse into country life complete with chickens and a little girl named Daisy. She uses the money from her sales to pay for school books and I wish her every success. I'm sure that I'll buy more as I have thoroughly enjoy using this soap which is scented with roses and has small pieces of oatmeal for exfoliation and is not at all drying to my hands.

Particulars: tutorial on making a felt brooch is found here; brooch dimensions: 2" diameter; I bought the wool felt (and matching embroidery floss) from Prairie Point Junction ( i.e. the wool felt connection); a comprehensive free on-line embroidery stitch dictionary is here; the chenille yarn for the washcloth is from Dancing Leaf Farm; to knit the washcloth I used US 11 needles - cast on 14 stitches - and knit every row until I had a square; you can buy the rose scented oatmeal soap here; the Wool Fat soap I buy from British Import shops.

As you can see, Mr Puffy is feeling great and getting out and enjoying himself. He is eating like a field hand and we like to say to him "Puff, you are A SURVIVOR!"

Steve and I thank you all for your well wishes and concern. Until next time, be well, love well, and happy crafting!