
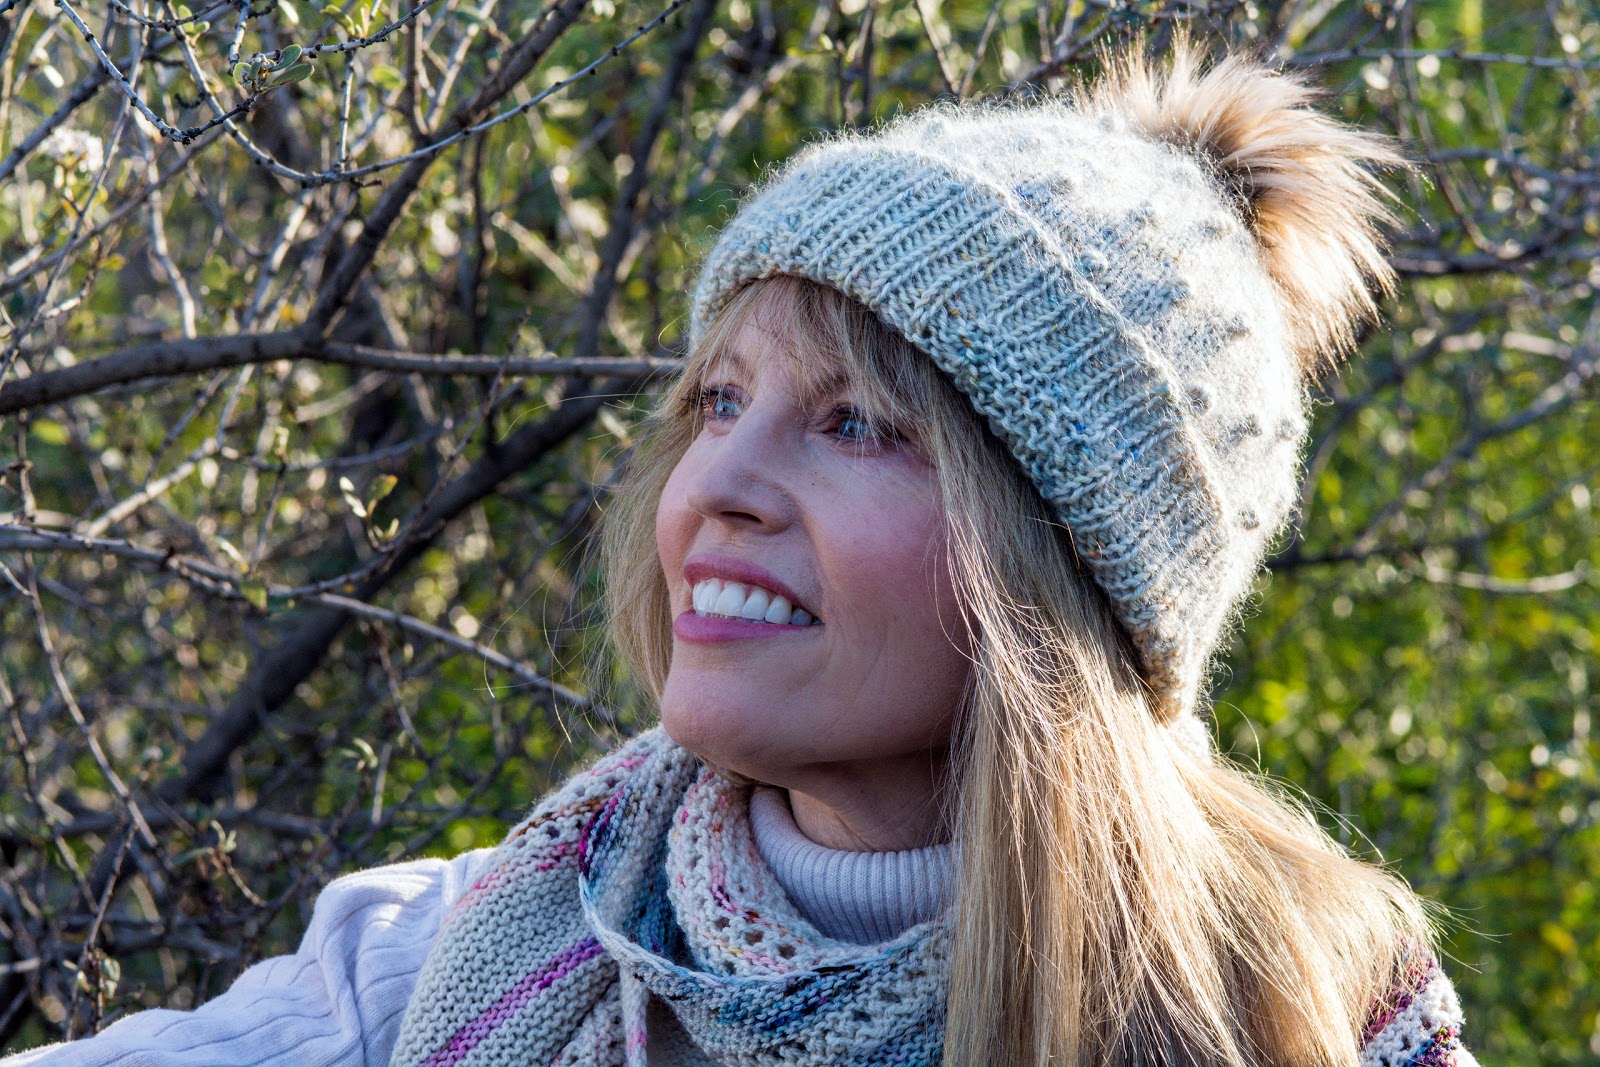
I've knit a lot of hats over the years but my new Kobuk hat has to be a favorite. It might be the gorgeous yarn which has both silk and mohair making it warm and luxurious, or maybe it's the perfect wintery color, or perhaps it's the fun hat topper, or maybe it's a combination of all three! It also has a really cool brim design that appears to resemble a crown that shows when the brim is turned down and worn slouchy style. Which unfortunately you don't see too well in my pictures for the simple reason that the hat was easier to photograph with the brim turned up! That being said the slouchy look with the brim showing is a cool look and I'll probably knock around wearing it that way too. No matter how you style it this is a great hat to have in your wardrobe.

I hope you noticed the cute hat topper! This is my first time buying a hat topper instead of simply making a pom pom using leftover yarn. Hat toppers are super on trend right now and I was curious whether I would like it better - and I do!!! I think the hat topper gives the hat a more modern and finished look and I'm going to pick up another couple of colors and styles to have a selection to switch up depending on the accent color I want. How will I do that? I read on a Rav forum that some hat toppers come with a snap closure which makes it easy to change them. But not all hat topper come with a snap closure and mine didn't. Instead I read where someone suggested sewing a button to the inside of the hat to which a hat topper can be tied on and off. And that's what I've done. To do this I recommend you select a medium sized button that is plastic and light weight so it is large enough to wrap the topper ties around while being washable and not so heavy that it will drag the hat down. This makes it easy peasy to have a wardrobe of hat toppers to switch around!

Particulars: Kobuk hat designed by Caitlin Hunter (Boyland Knitworks); knit using the Top Hat Set dyed by Lay Family Yarn (kingfisher colorway) yarn set includes 2 coordinating yarns (1 skein DK 55% Blue Face Leicester 45% silk (100g) and 1 skein 72% fine kid mohair and 28% silk). I used a Faux Fur pom pom in colorway creme brulee sold by The Burlap Kitchen. This a super easy and fun hat to knit. I used the Twisted German Cast-On for a stretching brim and I only knit through the upper (bobble) chart one and a half times to create a less slouch as I have a small noggin. Caitlin Hunter is a terrific designer and I have recently finished one of her sweaters that I can't wait to show you!
Incidentally the shawl/scarf that I'm wearing in these pictures is Enfilade by Lisa Hannes that I blogged as Multi Colored Shawls and Testing Yarn for Color Fastness.
Lucille's Red Cake Recipe ~
Steve's birthday comes early February and every year I bake him a birthday cake of his choice. He's chosen a variety over the years but he most often he requests his mother's Red Cake Recipe that she would bake for him when he was a boy. Lucille, his mother, graciously shared her recipe with me so that I could bake him the exact cake she made. It's not a typical red velvet cake as Steve doesn't like chocolate so there's less cocoa and it also doesn't seem as heavy and rich as some red cakes I've eaten. But it is light, colorful and perfect with a scoop of vanilla ice cream. In other words it's a quintessential old fashioned birthday cake. I'll conclude with what she wrote on the bottom of her recipe card "Good Luck!"

Lucille’s Red Cake
Recipe
Yield ~ 9" double layer cake
My only adaptation of Lucille's recipe, if you will, is to add violet icing color. Sans icing color the frosting is antique white.
Yield ~ 9" double layer cake
My only adaptation of Lucille's recipe, if you will, is to add violet icing color. Sans icing color the frosting is antique white.
Ingredients
For the Cake
1/2 cup (1
stick) of unsalted butter, softened
1 & 1/2
cups granulated sugar, (I use superfine baking sugar)
2 large eggs,
room temperature
2 tsp cocoa
powder (use natural cocoa and not dutch process)
1 ounce red food
coloring
2 & 1/2
cups of cake flour (sifted before measuring)
1 tsp salt
1 tsp of baking
soda
1 tsp white
vinegar
1 cup buttermilk,
room temperature
1 tsp
pure vanilla extract
For the Frosting
3 Tbs all
purpose flour
1 cup whole milk
1 cup (2 sticks) unsalted
butter, softened to room temperature
7/8 cup of granulated
sugar
1 Tbs pure vanilla
extract
Icing color (optional - cake is an antique white otherwise) I use Violet Icing Color by Wilton
Instructions
Cake:
Preheat oven to 350 degrees F. Prepare two 9-inch cake pans –either line bottom with parchment paper and butter sides or butter and flour entire pan.
Preheat oven to 350 degrees F. Prepare two 9-inch cake pans –either line bottom with parchment paper and butter sides or butter and flour entire pan.
In a
large bowl, cream together butter and sugar until light and fluffy - do not rush this process - beat at least 4 minutes. Add eggs, one at a time, beating well after
each addition. In a small dish make a
paste using the cocoa powder and a small amount of food coloring. Add to butter mixture and beat well. Add the balance of food coloring beating
well. Then add flour (mixed with salt)
and milk alternately (roughly 4 additions) beginning and ending with
flour. Beat in vanilla. Lastly combine vinegar and soda in a small
dish (it will foam up) and gently stir vinegar mixture into batter, mixing
well.
Pour
into cake pans and bake at 350 degrees about 30 minutes, or until a tester
comes out clean. Let cool in pans 5 minutes, then turn out onto a cooling rack
to completely cool before frosting.
N.B.
As soon as cake is out of oven I like to begin preparing the frosting (which
takes a little while because you have to heat the milk and flour and allow time
for it to cool, etc.) and you want to frost your cake as soon as it has cooled so
it will be as fresh as possible.
Frosting:
In a
small saucepan whisk together flour and milk until blended and cook over medium
heat, stirring constantly until mixture thickens. Set aside to cool. You can set pan in a basin of cool water to
speed along the cooling process.
In a larger mixing bowl cream together the butter and sugar until light and fluffy. Then add 1 Tbs of cooled milk and flour mixture to sugar mixture, beating well. Gradually add the rest beating all the time. Beat in Vanilla. If you choose to use icing color add it at this time, beating well. The texture of the frosting is similar to whipped cream. As soon as cake has cooled begin frosting.
In a larger mixing bowl cream together the butter and sugar until light and fluffy. Then add 1 Tbs of cooled milk and flour mixture to sugar mixture, beating well. Gradually add the rest beating all the time. Beat in Vanilla. If you choose to use icing color add it at this time, beating well. The texture of the frosting is similar to whipped cream. As soon as cake has cooled begin frosting.
Serve
with vanilla ice cream.
Good
luck!
Until next time be well, love well, and have fun with hat toppers!!!
Until next time be well, love well, and have fun with hat toppers!!!