Sunday, December 9, 2012

Victorian Frippery ~ and Holiday Crafting


Knitting and making a project that is truly your own is largely a factor of picking colors and texture that best compliment you.  But don't overlook how much the color and texture contribute to expressing the style of your project.  For example, I wanted this Sand and Sea Shawlette to be a sophisticated accessory piece for my wardrobe so I chose a mass produced yarn with a silk component to give it a sophisticated finish and combined it with colors that remind me of Victorian times.  The result is "Victorian frippery" which simply means that it's not knit for utility so much as for adding style.

Southern California, where I live, is having one of the warmest Falls in recorded history and so this holiday season I wanted to keep my style simple and yet still feel I've dressed up.  This shawlette is just the ticket for me because old England and the Victorian era way of celebrating the holidays really resonates with me.   Of course in Victorian times I likely would have been a peasant and not enjoying myself all that much but I don't dwell on that.


Particulars:  Sand and Sea Shawlette designed by Never Not Knitting (Alana Dakos) from her Coastal Knits pattern book; 2 skeins Shibui Knits (Staccato) in the velvet colorway; 1 skein Koigu Premium Merino (KPM); US 6 circular needles; finished dimensions: 60" x 12".   Other designs I've knit by this designer are her Autumn Vines Beret and Oak Grove Mitts.  I made no modifications whatsoever ~ this is an easy knit and great piece.  The only trick is when picking up your stitches (using wrap and turn technique) make sure you use the correct technique to avoid leaving a hole in the fabric (the prior link is to a tutorial to help you do so).


Holiday Crafting with Paper Mache ~


I'm no Picasso but nonetheless I had fun painting this old world style Christmas Santa.  I purchased the paper mache form a vendor who sells unfinished (as well as finished) pieces and what I really like is that she uses chocolate molds and so her Santas remind me of candy shops and the pretty foiled chocolates they sell at the holidays.


Particulars:  Paper Mache form purchased from Linda Hill's Etsy Shop; prepared with a coat of Gesso surface prep (which sealed the paper mache and made it easier to see the design); painted with acrylic paint; and embellished with German Glass Glitter (purchased from Meyer imports) which I adhered using mod podge.  I also made the wreath pictured below using a wire form and evergreen cuttings, milk pods; holly; and moss.  The star ornament is the only non-natural addition.  To keep the wreath fresh I remove the star ornament and milk pods and soak it in a basin of water overnight.


Until next time be well and love well and since we will be away through the New Year I would like to wish everyone a joyous and meaningful holiday season ~ from all of us at Mr. Puffy's Knitting blog ~


Monday, November 19, 2012

Bunny Bunny Who Has the Bunny ~ and ~ Skillet Cake Recipe

This is the well-dressed bunny and it's going to the first child of Steve's second cousin.  He happens to be a favorite of ours and it's been a pleasure watching him mature into a wonderful young man and meet and marry the woman of his dreams.  What a lucky baby this is.


It's not often that I have the occasion to knit for a baby and after giving it some thought I decided on knitting a baby blanket.  I reasoned what better way to wrap a baby in love and warmth and start them off early on the path to enjoying being wrapped in wool and wearing shawls?


But when I told Steve of my plans to make a blanket he asked me instead to make a toy.  Why a toy I wanted to know?  And he told me because he remembers from his childhood that he had a small toy he loved and a handknit Christmas stocking that a neighbor made for him and his sister.  And he wanted this child to have a special toy too.  It's funny how small acts of kindness can have such a lasting impact on someone.  After all these years Steve still remembers that neighbor, the toy, and the stocking.  And so together we chose this bunny pattern ~


Particulars:  Well-Dressed Bunny designed by Fuzzy Mitten; 1 skein Lush yarn by Classic Elite Yarns (50% angora 50% wool); US 6 needles.  This toy is knit flat and a very easy pattern to follow.  It's not as big as some toys I've knit but is the perfect size for a baby.  One of the advantages of knitting a toy flat is that the pieces can be washed and blocked prior to assembly.  To get my bunny's ears to lay flat and have a softened texture I partially felted the ears using hot water, soap and vigorous agitation before attaching them.  I knit this pattern as written but did add a bunny tail with angora yarn and the dress is slightly modified and also embellished with embroidered flowers (I made the petals with a detached chain stitch with a french knot for the center).  The hat is a simple rolled brim design.  For those interested I'll put my pattern notes for making the bunny tail and hat on my Ravelry notebook page.   Other toys I've knit are a mouse, a bear, an elephantmonster, owl, and a rabbit.

Apple Skillet Cake ~ or ~ Cherry Skillet Cake


I don't know if I should be flattered or offended.  Steve raved so much about this cake you would think he never had a nice piece of cake before.  This is the King Arthur Flour Apple Skillet Cake but with a number of modifications so rather than confuse you I've written it out below with my changes.  The original recipe is very highly rated and you might want to just use that.  But mine is a smidgen healthier (e.g. substituting canola oil for butter) and paradoxically a little less healthy (e.g. substituting brandy for apple cider) and has a few other small changes and it came out beautifully.


Apple Skillet Cake (or Cherry Skillet Cake)

Apple Mixture
4 or 5 apples (3 granny smith apples and 2 golden delicious) pealed and thinly sliced
1/3 cup organic dark brown sugar
3 tablespoons brandy
1/4  teaspoon nutmeg
1/4  teaspoon cinnamon
1/4 (scant) salt

Cherry Mixture
4 cups tart pitted cherries (I use 2 large jars of Trader Joe's Dark Morello Cherries in light syrup - drained)
1 1/3 cups sugar (if using unsweetened tart cherries) or 1/2 cup sugar if using drained sweetened cherries
2 1/2 Tablespoons tapioca
1/4 tsp. almond extract
1/2 tablespoon sweet butter (crumbled over the top of cherries - just before putting into the oven).

Cake Batter (use the same cake batter regardless which topping you use)
1 3/4 cups All Purpose Flour
3/4 cup white granulated sugar
2 teaspoons baking powder
1/2 teaspoon salt
3/4 cup warm milk (whole milk)
1 large egg
6 tablespoons canola oil
1 teaspoon vanilla extract

Steps:
1.  Preheat Oven to 350 degrees.
2.  Prepare 9" x 4" cast-iron skillet (butter and flour (or use granulated sugar))
3.  Combine apple mixture and set aside.
4.  Combine dry ingredients and set aside.  Mix wet ingredients and then stir (using wooden spoon) into dry ingredients until combined.  Pour into prepared skillet.
5.  Spoon the apple mixture (or cherry mixture) over the batter distributing the apples a little more heavily toward the edge of the pan and add all the liquid (brandy, etc.) as that will settle into the bottom of the pan and caramelize.  If using the cherry mixture dot the top with 1/2 Tablespoon sweet butter.
6.  Bake 1 hour or until apples are browned and cake tester come away clean.  I baked my cake an extra 10 minute (a total of 70 minutes).

Garnish cake with powdered sugar and serve slightly warm with ice cream or yogurt ~

The MisAdventures of Simcha  ~


G that went better than expected.  I kinda thought he might ask for a paternity test.

Until next time be well and love well and may you enjoy this holiday season with friends and family ~ and good cheer!  We'll be away a lot over the holidays but I hope to have some time for knitting.

Saturday, November 3, 2012

Amstel Hat and Hiking in Topanga

This is the Amstel Hat from the Fall 2012 Interweave Knits magazine.  I love it and it's going to be perfect for all the outdoor hikes that I go on.  I have to be honest and say that might not have chosen to knit this hat if I hadn't seen it in person in a LYS.  Some projects are like that.  They don't look all that wonderful in a magazine picture but are fabulous in person, probably because in a picture you can't really see the great texture or experience the tactile appeal.  As I don't have much to say about this project (other than I love it) instead I'm going to share a little about the hikes that Simcha and I take here in Topanga, California which is one reason why I need all the hats, mittens, and shawls that I'm constantly knitting.  


Particulars:  Amstel Hat designed by Kelbourne Woolens and published in (Interweave Knits Fall 2012); 2 skeins Road to China (The Fiber Company);  I made the following modifications to the pattern: 1)  I used the disappearing loop CO from techKnitting; 2) I used a twisted K rib for the brim; 3) I completed the pattern design twice and eliminated the final rows of pattern; 4) After completing the final row of patterning I purled a round and made the recommended decreases on that round with P2Together stitch; and 5) I used Jenny’s Surprisingly Stretchy BO from Knitty.  Love this hat!!!!


The Misadventures of Claudia and Simcha ~

I think I've mentioned before that Simcha and I go out on a hike every morning and sometimes again in the afternoons as well.   We both love being outdoors and we have tons of great trails all around us that we mostly have to ourselves.  Mostly.  We do share them with the local wildlife and that is primarily coyotes, deer and an occasional skunk.  

And, as can happen, the other evening when Simcha and I were out hiking I heard in the distance a pack of coyotes going crazy and yapping loudly.  I knew instantly that this was going to be too strong a temptation for Simcha to resist chase after them, which I obviously did not want him to do.  So I came up with a new command.  I call it the "Wait for Me" command and basically what you do is run after your dog calling out "Waaaaait for Meeee."  This should be interspersed with an occasional "I'mmmm Coming Tooooo."  Hopping up and down as if you have twisted your ankle adds a nice effect if combined with a sharp cry of pain for attention.  Thankfully the years of training and discipline have paid off because in the distance I could see Simcha turn his head to look back over his shoulder at me and then slow his pace as he waited for me to catch up.  Once I had his attention I picked up a stick and threw it for him to chase and thereby successfully diverted his attention away from the coyotes.  


I can't tell you what a pleasure it is to have a dog that is responsive to commands and is such a great hiking buddy.  He's been primarily trained to follow hand signals and I think that has fostered a strong bond that allows us the freedom to take the type of hikes that we do.  Which isn't saying that we don't have the occasional misadventure along the way. 

A Sweet Treat ~ Pumpkin Poppers


These fragrant pumpkin poppers are moist and spicy ~ a perfect Fall treat to enjoy with your coffee or tea.  I used the recipe from Domestically Speaking and modified it by using dark brown organic sugar (versus light brown) and whole milk versus low-fat.  I had tons of cinnamon sugar left over even when making less than the recipe called for.  I made my cinnamon sugar mix using 1/2 cup white sugar and 1 tablespoon cinnamon.  As you can see in the picture I made some "poppers" and some small muffins.  If you don't have a mini muffin tin making small cupcake sized muffins is a great alternative you simply need to increase the cooking time.  I cooked my muffins approximately 22 minutes.  Instead of rolling mine in gobs of butter I melted 2 tablespoons of butter and applied that with a pastry brush and then liberally sprinkled with cinnamon sugar.

Simcha really enjoyed these, judging from the four (4) muffins missing from my kitchen counter (paper included).  Other sweet pumpkin treats I've shared in the past are a pumpkin bread and a pumpkin chocolate  chip cake ~ both very yummy.

Until next time be well and love well and enjoy the colors, texture, and flavors of this season as we are fast approaching Winter!

Wednesday, October 17, 2012

Halloween Socks and Ghosts and Ghouls ~

Who knew knitting with self-striping sock yarn was so much fun!  I'm just sorry I waited so long to give it a try.  Albeit mayhaps my yarn color choice might be questioned but I am not deterred.


Wouldn't these socks look great worn with a long black dress, pointed black shoes, and a tall pointed black hat!  Oh dear, do you suppose I might then look like a witch?  All I would need to complete the look is a broomstick, a cauldron and a toad.  I'd better rethink wearing these with black.  In any event I'm sure I'll have plenty of outfits that go well with bright green and dark purple stripes.  In fact I'll probably end up wearing them more than you can imagine.  Maybe.


This is a fun pattern, but to knit it with ease you will need to know how to do a seamless yarn join if you want to knit it with a solid color heel and toe.  When you knit the solid areas you need to cut out the contrasting colors and rejoin the yarn as often as necessary to knit a solid color block.  This can be a hassle if you do not know how to do a seamless yarn join and so I'm going to share with you how I do a "spit and twist" seamless yarn join.  If you are squeamish about germs or have "issues" with spitting into you hand then this is not the yarn join method for you.  Otherwise read on.

Mr. Puffy's knitting tip for a seamlessly yarn join ~ Spit and Twist Method

Caveat.  The spit and twist yarn join method will only work with yarns that will "felt."  In other words it will not work with superwash yarn or cotton blends, etc.  If you are in doubt, simply test your yarn to see if it will felt by rolling a small amount in your palm with moisture and see if the fibers felt together.

Steps:

1.  Tie a knot in the two ends of yarn that you want to join seamlessly leaving approximately a 2 inch yarn tail on both sides.  Tug on the knot to make sure it is snug.

2.  Working each side separately, carefully untwist the 2 inch yarn tail into individual plies which opens up and loosens the fibers.  Cut off roughly half of the yarn plies roughly 1/2 to 1/4 inch from the knot.  Wrap the remaining yarn plies around the new yarn strand.

3.  After both sides of the yarn tails have been prepared, lay the yarn in your palm with the knot in the center.  Now spit into your palm covering all areas of yarn that you want to felt.  Now vigorously roll (i.e. twist) the yarn in your palm until the fibers felt together forming a seamless join.  Periodically open your palm and check to see if you need to add more moisture and that your yarn plies lay flat.  You want the felted yarn to be only minimally more bulky at the join than otherwise.


4.  Do not knit with your yarn until it has dried completely.  I also like to test the join by giving it a slight tug.  If it has fully felted it should feel as solid at the join as the rest of your yarn.

If you would like a visual demonstration I found this video showing the "spit and splice" method which is very similar, but does not begin with Step 1 (i.e. tying a knot).  I like to begin by tying a knot because that helps stabilize the yarn which is particularly helpful if you want a precise color change at the join.


Particulars: Down the Rabbit-Hole (ravelry link) a free pattern by designer Kimberly Pieper; 1 skein Laudanum Lache in the Witchy Bitchy colorway (380 yards self striping yarn) by Rainy Days & Wooly Dogs aka: gothsocksyarn; US1 needles medium size (64 CO).   This is a gem of a free pattern and I highly recommend it for self-striping yarn.My only modification was to stop the spiral at the start of the toe rather than knitting the spiral to the end.  My only caution is that the spiral pattern causes the leg to be tight without much "give" (as opposed to a rib pattern which has lots of "give") and so you want to make sure you have enough give to slide over your heel.  My standard sock formula is US 1 needles with 64 stitches which is the medium size for this pattern.


To see more Halloween inspired socks, self striping socks, or virtually any type of sock pattern you can imagine visit my favorite sock yarn muse, Andi, who writes the very entertaining knitting blog my mysistersknitter.

 ~ Halloween Ghost Story ~


This Pumpkin Girl was sewn from scraps of wool felt and embellished with odds and ends from around my house (twigs and various sewing notions).  She is a type of American primitive folk and  I bought the pattern from The Cheswick Company which sells a number of fun Halloween and primitive craft patterns.

And now, in honor of Halloween, I'm going to share with you a true ghost story based on events that happened to me many years ago.

It was well past midnight on a dark and lonely night.  The wind was howling outside and I lay alone beneath my bed covers shivering in anxiety and anguish as a worry took hold of my mind and would not let go.  I was in a state of despair and there was nothing I could do except pray. Unworthy as I am I tremulously offered a prayer seeking solace and wisdom.  And it wasn't long after that I heard a scratching noise at the front door as if something or someone was trying to enter the house.  I leaped up in fright and crept over to see who or what was at the door.  Standing there was a black dog that I recognized as belonging to a neighbor.  I opened the door and in she walked as if she belonged.  I crouched down and hugged her and was overcome with relief that in my hour of darkness I was not alone.  After a time I opened the door and into the night the dog disappeared and I returned to bed and fell asleep.  Never before or since that night has this dog ever come to our home in the night, let alone a house dark with no light on.  Why would this dog appear then and there?  Some might say that dogs have senses that humans don't and maybe she was able to sense my distress.  But where we live the houses are not close together and I wasn't making a sound.  I just do not find that explanation plausible.  What I believe is that this dog came to me as an answer to my prayer for solace that night.

Until next time be well and love well and may you have a frightfully fun Halloween filled with spooky decorations, yummy pumpkin goodies, and only friendly ghosts.

Thursday, September 20, 2012

Wandering The Moors Shawl ~

One reason I enjoying knitting as a hobby is because I'm able to create clothing for myself evocative of an earlier time in history. Something I can't simply purchase off the rack. The Wandering the Moors shawl that I'm wearing is a great example of this because it positively oozes medieval charm from it's homespun feel to its mystical reference to the moors.


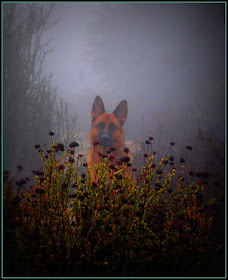
I am intrigued by the moors having read numerous mystery novels with the story set on or near the moors.   So imagine my delight when I actually met a knitter who resides on the moors where she runs Barnabas House B&B with her husband, blind mother, and her adorable german shepherd dog, Brio.  I was so taken with the beautiful photos of the area where Carolyn lives and Brio's story (which I have shared at the end of this post) that I suggested that the Ravelry group we both belong to (German Shepherd Lovers) might enjoy knitting the Wandering the Moor shawl as a group project.  I feel very connected to this group where we share so much in common, not just our love of knitting and dogs but also our kindred spirits.  This way we could all be a part of Brio's walks on the moor no matter where we lived, where our life path may take us, or our imagination might transports us.


I am happy to report we had 18 participants in our Wandering the Moor Knit Along and saw many wonderful interpretations of this pattern and shared interesting stories about each of the knitters and the areas where we live.  If you are a member of Ravelry you might enjoy visiting the main German Shepherd Lovers group which has a wealth of information about German Shepherd dogs and many beautiful, silly, and inspiring pictures and stories of our shepherds.


Besides its locale appeal, I am really thrilled that I made this shawl.  The alpaca yarn I used is light yet cozy and has a wonderful rich luster, and the shawl is a very wearable size and color.  I particularly like the above photo because to me it looks as if I am ready to strap on a sword and leap onto the back of a horse and gallop off seeking adventure.  That's not realistic, of course.  Because I am lacking a horse.  And a sword.  And what I really am about to do is go home and fix dinner.  I guess that means there won't be any adventuring for me today unless it's vicariously through a novel.  But that doesn't mean I won't find an adventure tomorrow, and with my shawl I'll be ready.


Particulars:  Wandering the Moor shawl pattern; inspired by Jane Eyre; designed by Celeste Glassel; Toft Alpaca British Alpaca, 3 skeins Fine Chestnut colorway; US 6 needles.  I modified the pattern by centering the pattern to have a "true" center rather than being off by one stitch.  I did that by changing the pattern's center repeat to: ((KFB, CS, KFB)) from ((KFB, SM,KFB, K1)).  Note that it’s the same number of stitches (5) but this changes creates a true center.  I also modified the pattern slightly by making all my increases as "M1" versus "KFB" and I simply used a true garter stitch tab along the edges.  It's a very simply pattern and makes a lovely cozy wrap to wear.  Finished blocked (lightly) dimensions (I made the larger size) 25" x 60".   Previous knits that I've made with Toft Alpaca yarn is their Pebble Bag Kit blogged as Alpaca Never Felt So Good.

P.S. The shawl pin seen in this post was made for me by Sherrie (SmotoExpress) one of the knit along members.  She designed this pin specifically to wear with my shawl and it couldn't be more perfect.  I am incredibly touched and appreciative of her thoughtfulness.  


Brio's Story ~


This adorable german shepherd is Brio who at the age of 2-3 years was rescued by the Devon GSD Rescue.  At the time of his rescue he had been starved and beaten and as a result was suffering from chronic renal disease.  Despite receiving plenty of food he is still quite small due to his early neglect (he weighs about 65 lbs).  He is understandably wary of new things but Carolyn tells me his love is fierce and bright just like his name "Brio" which means "playing with brilliance," in musical parlance.


It was Brio's good fortune when Carolyn came into his life and he was transported from the rescue facility into the Dartmoor National Park in Devon, UK, where Carolyn runs the Barnabas House B&B.  Now Brio's days are filled with wonderful walks on the moors and cozy evenings in the Inn playing with squeaky toys and receiving lots of cuddles from his forever family.  I love seeing the pictures that Carolyn shares of Brio romping on the moors and and watching this little dog who truly plays with brilliance.  And bless his furry little heart he deserves all the love and enjoyment that life offers.  There are many worthy charities that call to each of us but dog rescues operate on a shoe string budget caring for throwaways and abused dogs that often require medication care. Giving to charities such as Devon GSD Rescue or donating blankets or food to your local rescue is always appreciated and needed.


Thank you Carolyn for letting me share Brio's story and your beautiful pictures of Dartmoor National Park ~

Until next time, be well and love well and may we all enjoy adventures and wonderful wanderings wherever we may find ourselves. 

Sunday, August 26, 2012

Gaucho Vest

Just in time for Fall 2012 I finally finished and am wearing my new Gaucho Vest knit in La Lana Wools plant dyed yarn.  This despite some major set backs delaying me by years.


I don't even want to tell you how long this project has been on the needles.  But I'll give you a few hints simply by way of reference to changes that have taken place since I first cast on. In America we have a new president in office who has served his term and is running for re-election; the shop where I bought the wool for this project has since closed it's doors (sniff sniff); and Simcha, our German Shepherd dog, wasn't even born yet, just to name a few things.  Any project that languishes that long on the needles tells you something very important and that is this was a nightmare knit.  It wasn't so much that the pattern was complicated to follow.  No, instead it was because I needed to modify the pattern to a more fitted style while maintaining the integrity of a complicated textured design.


I've found that most patterns are not designed to be fitted and you need to be prepared to make the effort to adjust the pattern to your fit.  If you don't do that you most likely will not enjoy wearing the finished project, as most women don't look good wearing a box shaped garment.  I think this is one reason knitting shawls is so popular with knitters because a shawl can be knit simply following the pattern with hardly any attention to gauge or sizing and you will still have a spectacular and wearable result.  But knitting a garment is more fraught with sizing risk and if you follow a pattern exactly as written you might end up with something fit only to wear in the private confines of your own home.

So rather than explain at length how I adjusted this vest pattern to my size (as it is highly unlikely anyone will ever knit this vest now that the yarn shop has closed and this unique yarn is no longer available), I'll instead share with you a knitting tip applicable to any fitted garment.

Knitting Tip to Achieving a Fitted Garment ~  With a long soak and a firm block most wool can be coaxed into a larger size (within reason) but no amount of water (tears) can make it smaller.  My point being that it is best to err on the side of knitting something a bit smaller than you think it should be and then use the finishing stage to achieve the exact fit you want.  Once you have cast off all pieces of knitting give them a long warm water soak (wash according to manufacture's instructions) and then wet block using pins to the exact finished measurement you want before sewing your garment together.  It's best to write out the finished measurements you want and have a tape measure and tons of straight pins handy for the wet block.  Do not remove pins until pieces are completely dry.


Particulars:  Gaucho Vest designed by Linda Romens; 3 skeins La Lana's Streakers and 4 yards La Lana's Lincoln thickspun; US 9 needles.  I had to modify the top half significantly to achieve a more fitted and shaped vest and blocked firmly to specific measurements.  It's a really lovely finished piece and I'm glad I made the effort to complete it. I added some ties inside so I can wear it closed in front if I wish to, but I actually prefer it open.  I really like this designer and have previously knit her Sea Foam Shawl and her "A very Nice Scarf" 

Thank you for the Memories Mr. Puffy ~


You might recognize the trim from this vest being modeled here by Mr. Puffy, who has since passed away.  I was going to write something funny that I'm sure would have made you laugh.  But instead I find myself sitting here staring at his picture and I just can't bring myself to write anything humorous.

Until next time be well and love well ~ and think of those things in your life where you might relish a sense of accomplishment by finishing what you have started.

Wednesday, August 1, 2012

Embroidered Locket Tutorial ~

Lockets have always appealed to me, ever since I received my first locket as a gift when I was a young child.  It was a tiny locket on a pretty gold chain and I knew exactly whose picture I wanted to be in that locket.  It was our family dog, Cha Cha.  With the help (and approval) of my mother I found the perfect picture of Cha Cha and cut out her face and glued it into my locket.  I can still remember how much I loved seeing her furry face peering out at me whenever I opened that locket.  To this day when I think about Cha Cha it's that image of her face that I have captured forever in my heart.  And that's why I think lockets are special.  They are a tangible way to always carry with you the memory of a special someone.

And since peak of Summer is a perfect time to take a break from knitting, I'm going to share with you a favorite quick project of mine which is  making an embroidered locket.  The lockets I like to use have two sides (one side for a picture and one side to decorate with embroidery).


How to make a free-style embroidered locket ~

This is a very easy project but a basic understanding of embroidery is necessary (and assumed) such as how to use an embroidery hoop, etc.

Step 1:  Gather your materials (linen fabric, embroidery floss, empty locket, etc.).  I have listed below the links and/or sources to all the materials I used to make the lockets shown in this post.

Step 2:  Find a coin or other small object to measure the area you want to cover in your locket to use as a template.  Whatever design you want to embroider it will have to fit within this area.  Using a pencil or marker trace lightly around the coin onto your linen fabric to give yourself a visual guide to the area your embroidery design can not exceed.

Step 3.  These lockets are made using free style embroidery, which simply means that I didn't use a pre-printed design.  Instead I visualized a picture of what I wanted to embroider and made a few rough sketches on the linen fabric and then began filling in the picture with embroidery stitches.  For example, the top locket is a cluster of foxglove flowers.  I used a combination of straight stitches and french knots in this design.  I used the straight stitch to make the grasses and flower stems and french knots to create the flowers.  You can be as inventive or elaborate as you wish in your design, but the small size of a lockets probably works best with a simple design and stitches.

Step 4.  This is important!  After you finish with your embroidery you will cut out the circle of fabric you drew INCREASED by an additional 1/4 inch edge.  You will then apply a small amount of basting glue to this additional 1/4 inch of fabric and fold it over over to make a "hem."  This "hem" is to prevent fraying of the fabric edge which could happen if you simply cut out the circle of fabric in the size you need.

Step 5.  Apply a small amount of basting glue to the entire back surface of your fabric circle and quickly place it into the locket holding it firm until the glue sets.  I use a blunt knitting needle to press and ease the fabric into place being careful not to crush the embroidery stitches as much as possible.

Step 6.  Attach a piece of linen string for a necklace and begin the hunt for the perfect picture to add to your locket!  These are nice to have on hand when you want to include a little something handmade into a gift.


Supplies/Materials: a small piece of linen fabric (I purchase my linen squares from Lorna Bateman's etsy shop); an embroidery hoop; several colors of embroidery floss (I like to use DMC floss (available at most craft stores) and chameleon hand-dyed threads from South Africa (I purchase mine from Loran Bateman's etsy shop) both types of embroidery floss are used in these lockets; an embroidery needle; an empty locket (the lockets used in this post are a combination of brass and copper; 1.5" diameter; and were purchased in bulk on Etsy under "supplies"); basting glue (I like both Jillily Studio Appli-Glue and Glue-Baste-It); a coin or similar object that can be used to trace the inner circle of your locket; a small piece of linen string to use as a necklace cord (mine is 26 inches long and hangs 13 inches down); and ~ inspiration ~ you can see from my lockets I am inspired by flowers and nature.  Embroidery is very easy to learn with lots of free resources online.  If you are new to embroidery I think the following link is a helpful resource to explain the stitches along with helpful diagrams: embroidery stitch dictionary.

The MisAdventures of Simcha


Simcha has been remarkably well behaved these past few months.  Well, except for those dress shoes of Steve's he destroyed and the rolls of toilet paper he chewed up and the ear of corn he stole and the ceaseless barking at coyotes.  But all in all we are seeing improvements!

Until next time, be well and love well and may you always hold in your heart the memory of those you love.  In closing here's a picture of me holding Cha Cha, our family dog, who was a gift to me and my sister as well as my parents.  We all loved her very much.


Sunday, July 8, 2012

Bud ~ a Summer Sweater and Lemon and White Chocolate Muffins


I'm out for an evening stroll in my new cardigan.  Anyone who thinks knitting is only for the Winter months is seriously missing out on all the wonderful Summer knits.  To knit clothes for the Summer you simply have to knit in fibers other than wool.  It's that simple.  This cardigan is knit in a combination of silk and cotton and is perfect for cool Summer evenings or foggy mornings at the beach and typical for a Kim Hargreaves design it is a classic and timeless wardrobe piece.


As I've gotten older I've found it harder to find my personal style.  I don't want to I no longer can wear the same styles that I did in the past but we all want to look the best we can at whatever age we are.  Knitting has helped me transition to middle age by allowing me to wear the colors and styles that suit me best.  I know for some knitting is a fad but for me it's a means of self expression and a connection with a part of myself that is still me no matter what age I am.  I guess what I'm saying is that I want to age like a cozy cardigan that is classic and timeless and loved no matter how misshapen and lumpy and bumpy it becomes!    


But enough about me!  It's time for a Mr. Puffy Knitting Tip ~ whoo hoo.

This knitting tip is the key to knitting a large oversized sweater such as Bud and not have it look (and feel) masses too large.  It's all about getting the sleeves to fit well.  I knit the small size for this pattern exactly as written - except - for the sleeves.  I knit the sleeves custom by calculating the stitches so that the cuff fits my wrist with just a little ease and the arm length and width similarly have been adjusted.  If I had knit the sleeves as directed for the small size then the sleeves and cuff would have been almost twice the size that they are which would have been waaaay too big.  The best way to figure out how to adjust a sleeve to your own custom fit is to lay out a sweater you already have with sleeves that fit you comfortably or close to how you want your finished sleeves to fit. Measure the width of the cuff and arm as well as the length of the sleeve.  Then, using those measurements and your gauge adjust the pattern accordingly.  I find that I often have to custom knit the sleeves in a pattern even if the body measurements and gauge otherwise can be knit according to pattern instructions.


Particulars:  Bud (a classic cardigan with pockets); design by Kim Hargreaves ~ Misty in Light and Shade collection; US 6 & 8 needles; 11 skeins Rowan Summer Tweed (70% silk / 30% cotton); 4 sea green abalone buttons.  I knit the XS size with sleeves modified as explained above.  Overall this is a very simple design to knit and a pleasure to wear although to be honest I didn't really enjoy knitting with this yarn.  Kim Hargreaves is a wonderful knitwear designer and I have previously knit her following designs: Flo (cardigan); Emily (sweater); Calm (Sweater); Bonnie (hat); Soul (hat); Haven (scarf set); and Raindrop (cardigan).  


Lemon and White Chocolate Muffins ~


About 10 years ago Steve and I traveled through New Zealand and whist there I quickly ascertained that the New Zealanders knew their muffins.  Everywhere we went they had wonderful coffee shops serving fabulous looking muffins.  So when I recently had a taste for a muffin I searching for a good muffin recipe on a New Zealand recipe site and found this wonderful Lemon and White Chocolate Muffin recipe.  I modified it to add a very thin slice of lemon on top and made them slightly larger (I used a large muffin tin versus cupcake size tins).  Due to the larger size I increased the baking time to 30 minutes and yielded 7 muffins.  Prior to baking I added the lemon slice and sprinkled it with extrafine white sugar.  After baking I spooned the glaze over the top of the lemon slice and over the top.  I have to say white chocolate and lemon is a sinfully delicious combination.

Until next time, be well and love well and make time to enjoy fresh baked muffins this Summer before you start contemplating your Fall knitting  ~